Ensure the garage door opener is unplugged to avoid any electrical mishaps. Safety first! Clear the area where you’ll be working and make sure you have adequate lighting.
2. Position the Photo Eyes
Photo eyes need to be installed on either side of the garage door, about 6 inches above the ground.
Use your measuring tape to ensure they are at the same height. This alignment is crucial for the sensors to work correctly.
3. Mount the Sensors
Most photo eye sensors come with brackets. Attach these brackets to the walls or the tracks of your garage door using the provided screws.
Make sure the sensors are facing each other directly. This is important as any misalignment can cause the sensors to malfunction.
4. Run the Wires
Now, you need to connect the photo eyes to the garage door opener. Start by running the wires from the sensors to the opener.
If your garage has pre-existing wiring channels or conduits, use them for a neater installation.
5. Connect the Wires
Using your wire strippers, remove about half an inch of insulation from the ends of the wires. Typically, you’ll have two wires: one for power and one for signal.
Connect these wires to the corresponding terminals on the garage door opener. Most openers will have clearly marked terminals for the photo eyes.
6. Secure the Wires
Once the wires are connected, use wire nuts to secure the connections. Wrap these with electrical tape to ensure they stay in place and are insulated.
Tidy up any loose wires using cable ties or clips, keeping them away from any moving parts of the garage door.
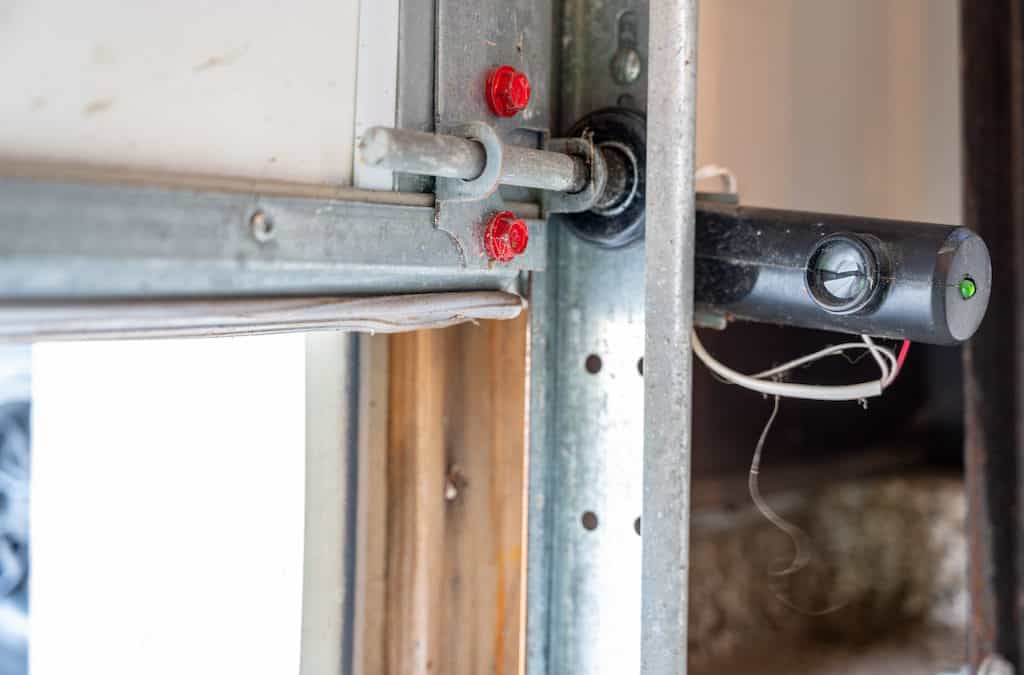
7. Align the Sensors
With the sensors mounted and wired, plug in the garage door opener. The sensors typically have indicator lights.
If they are aligned correctly, the lights should be steady. If they blink or are off, you might need to adjust the position slightly until the alignment is perfect.
8. Test the System
Close the garage door using the opener. Then, wave an object in front of the photo eyes to test if the door stops and reverses.
This test ensures the sensors are functioning correctly. Repeat the test a few times to be sure.
9. Final Adjustments
If everything works correctly, tighten all the screws and double-check the wire connections. Make sure the sensors are secure and the wires are neatly fastened.
Troubleshooting Tips
Lights Not Working
If the indicator lights on the sensors are not lit, check the power connections. Make sure the wires are properly connected and not damaged.
Misalignment
If the door does not reverse when an object is placed in front of the sensors, recheck the alignment. The sensors must face each other directly without any obstruction.
Intermittent Issues
If the sensors work inconsistently, there might be loose wires or the sensors could be dirty. Clean the sensors with a soft cloth and check all wire connections.
Ensuring Safety with Photo Eyes
Wiring photo eyes to a commercial garage door is a task that enhances safety significantly.
When you follow these steps, you can ensure your garage door operates smoothly and securely. Properly installed photo eyes prevent accidents and protect property, giving you peace of mind.
If you find the process challenging or need professional assistance, Peter and Sons offer expert installation services.
Their experienced team can handle the wiring and ensure your system is set up correctly. For more information, visit their website at Peter and Sons.
When you learn how to wire photo eyes to a commercial garage door, you not only comply with safety standards but also ensure a safer environment for everyone using the door.