How to a Treadle Gummed Hose Switch for a Commercial Garage Door ?
Installing a treadle gummed hose switch for a commercial garage door may initially appear challenging, but with the appropriate guidance, it becomes quite manageable.
This switch is crucial for ensuring the smooth and safe operation of your commercial garage door.
In this blog, we will guide you through the step-by-step process of installing a treadle gummed hose switch.
What Is a Treadle Gummed Hose Switch?
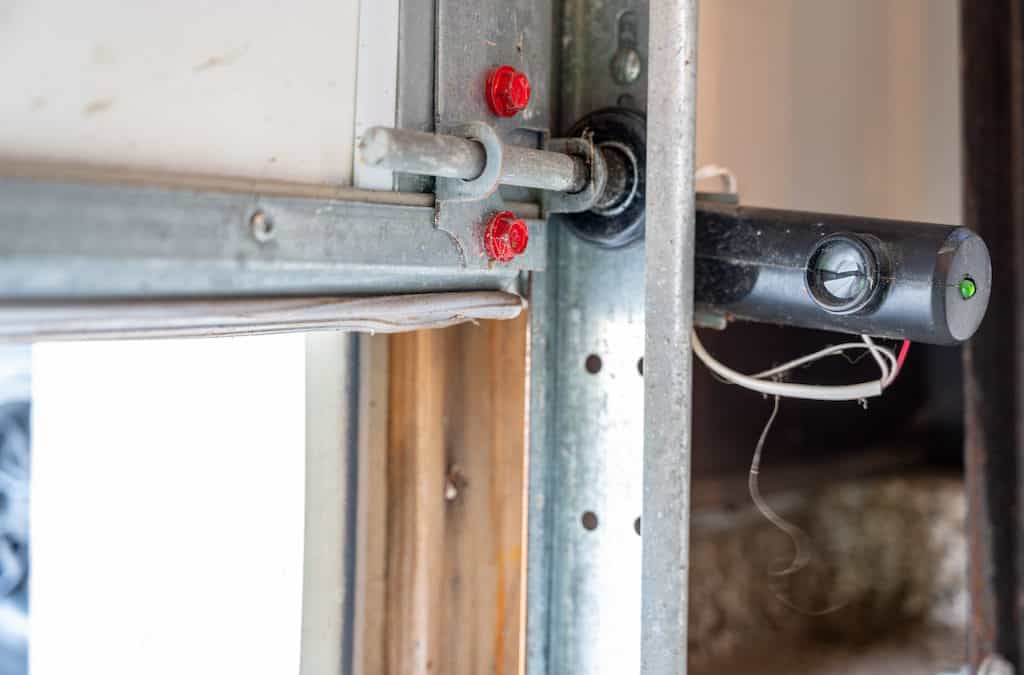
Before we proceed with the installation process, it is important to understand the function and significance of a treadle gummed hose switch. This switch is commonly used in commercial environments where large doors frequently need to open and close.
The switch consists of a hose placed on the ground, which, when stepped on, activates the mechanism to open or close the door. This setup is particularly useful in settings that require hands-free operation, such as busy garages and warehouses.
Tools and Materials Needed
Before starting the installation, gather the following tools and materials:
- Treadle gummed hose switch kit
- Drill with bits
- Screwdrivers
- Mounting brackets
- Screws and anchors
- Electrical tape
- Wire connectors
- Measuring tape
- Pencil or marker
Step-by-Step Installation Guide
1. Prepare the Area
First, ensure that the area where you plan to install the switch is clean and free of debris.
This will make the installation process smoother and prevent any potential issues with the switch’s operation.
2. Measure and Mark the Placement
Using a measuring tape, determine the best location for the hose. It should be positioned in a spot where it can be easily stepped on to activate the switch.
Once you’ve found the ideal location, use a pencil or marker to mark the placement of the hose and switch.

3. Install the Hose
Lay the hose on the ground along the marked placement. Ensure it is straight and free of kinks, as any bends or twists can affect its operation.
Once positioned correctly, secure the hose to the ground using the provided mounting brackets and screws. Make sure the hose is firmly in place but not overly tight, as this could damage it.
4. Mount the Switch
Next, mount the switch unit near the hose. The exact location may vary depending on the design of your commercial garage door and the switch kit.
Typically, the switch should be mounted on the wall or a nearby sturdy surface. Use the drill to make pilot holes, then attach the switch using screws and anchors.
5. Connect the Wiring
With the switch securely mounted, it’s time to connect the wiring. This step is crucial and should be done with care to ensure safe and effective operation. Follow the instructions provided with your switch kit for wiring details.
Generally, you will need to connect the switch to the door opener’s control unit. Use wire connectors to secure the connections and wrap them with electrical tape for added safety.
6. Test the Switch
Once all connections are made, it’s time to test the switch. Step on the hose to activate the switch and observe the door’s response.
The door should open or close smoothly without any delays or issues. If the door does not respond correctly, double-check the wiring and ensure all connections are secure.
7. Final Adjustments
If necessary, make any final adjustments to the hose and switch placement. This may involve repositioning the hose slightly or tightening the mounting brackets.
The goal is to ensure that the switch operates reliably every time the hose is stepped on.
Tips for Maintenance
To keep your treadle gummed hose switch in good working condition, regular maintenance is key. Here are some simple tips:
Regular Cleaning
Keep the area around the hose and switch clean and free of debris. Dirt and grime can interfere with the switch’s operation.
Inspect the Hose
Periodically check the hose for any signs of wear or damage. Replace it if necessary to prevent malfunction.
Check Connections
Ensure that all wiring connections remain secure and free from corrosion. Loose or damaged wires can cause operational issues.
Enhancing Efficiency and Safety with a Treadle Gummed Hose Switch
Installing a treadle gummed hose switch for a commercial garage door is a straightforward process that significantly enhances the functionality and safety of your facility.
When you carefully follow these steps, you can ensure a smooth and efficient installation. For high-quality garage door solutions and professional assistance, consider reaching out to Peter and Sons.
They provide a comprehensive range of products and services to meet all your commercial garage door needs.
For more information about their services, visit their website.
You might like these