Simple Steps to Reset Your Garage Door Opener

Simple Steps to Reset Your Garage Door Opener

Syncing Your Garage Door Opener Made Easy

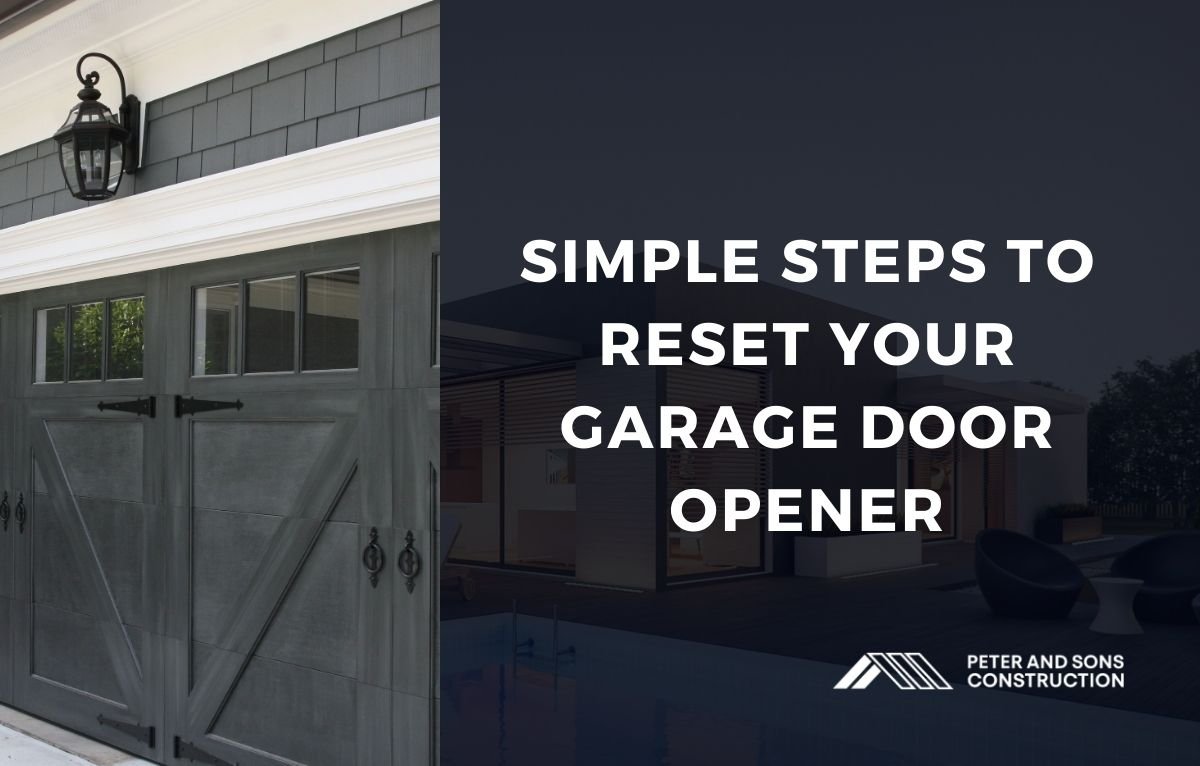
Resetting your garage door opener can resolve many common issues, such as syncing problems with the remote or keypad, or restoring the system after a power outage. Knowing how to reset a garage door opener can ensure your garage door operates smoothly and securely. This article provides a comprehensive guide on how to reset your garage door opener, including various methods and tips to make the process easier.

When to Reset Your Garage Door Opener

Common Reasons for Resetting

Resetting your garage door opener might be necessary for several reasons, including:

  • Lost remote control – Ensuring no unauthorized access.
  • Power outage – Restoring the system after a power interruption.
  • Sync issues – Resolving problems with remote or keypad functionality.
  • Security updates – Updating security codes to prevent unauthorized entry.

Benefits of Resetting

Resetting your garage door opener can offer several benefits:

  • Improved security – Prevents unauthorized access with updated codes.
  • Enhanced functionality – Resolves technical issues and improves performance.
  • Peace of mind – Ensures your system operates as intended.

Preparing to Reset Your Garage Door Opener

Gather Necessary Information

Before you start the reset process, gather the following information:

  • Garage door opener model – Identify the model and manufacturer of your opener.
  • User manual – Have the user manual on hand for specific instructions.
  • Access to the opener unit – Ensure you can easily reach the motor unit and control panel.

Safety Precautions

Take safety precautions to prevent accidents during the reset process:

  • Disconnect power – Unplug the garage door opener to avoid electric shock.
  • Secure the door – Ensure the garage door is closed and secure.

Step-by-Step Guide to Resetting Your Garage Door Opener

Step 1: Locate the Learn Button

The first step in resetting your garage door opener is locating the learn button on the motor unit:

  • Find the button – The learn button is usually located on the back or side of the motor unit.
  • Identify the color – The button is often colored red, yellow, green, or purple.

Step 2: Press and Hold the Learn Button

To reset the garage door opener, you need to press and hold the learn button:

  • Press and hold – Press and hold the learn button for about 10 to 30 seconds until the indicator light turns off. This erases all previous codes and settings.

Step 3: Reprogram the Remote Control

After resetting the opener, you need to reprogram your remote control:

  • Press the learn button – Press the learn button briefly and release it. The indicator light will turn on.
  • Press the remote button – Within 30 seconds, press and hold the reset button on your remote control that you want to program. The indicator light will blink, confirming the code has been accepted.

Step 4: Reprogram the Keypad

If you have a keypad, you will also need to reprogram it:

  • Enter the new code – Enter a new code on the keypad.
  • Press the learn button – Press the learn button on the motor unit briefly and release it.
  • Enter the code again – Enter the new code on the keypad and press the enter button to confirm.

Troubleshooting Common Issues

Remote Control Not Working

If the remote control does not work after resetting, try these steps:

  • Check the battery – Ensure the remote control has fresh batteries.
  • Repeat the process – Go through the programming steps again to ensure proper syncing.
  • Consult the manual – Refer to the user manual for specific troubleshooting tips.

Keypad Not Responding

If the keypad is not responding, consider these solutions:

  • Verify the code – Ensure you entered the correct code during programming.
  • Check the battery – Replace the keypad batteries if necessary.
  • Repeat the programming – Follow the programming steps again to ensure accuracy.

Opener Not Responding

If the garage door opener itself is not responding:

  • Check the power – Ensure the opener is plugged in and receiving power.
  • Inspect the wiring – Look for any loose or damaged wires.
  • Consult the manual – Refer to the user manual for additional troubleshooting tips.

Maintaining Your Garage Door Opener

Regular Testing

Regularly test your garage door opener to ensure it is functioning correctly:

  • Monthly checks – Test the remote and keypad monthly to catch any issues early.
  • Safety features – Test the auto-reverse and other safety features to ensure they work properly.

Professional Maintenance

Consider professional maintenance to keep your garage door opener in top condition:

  • Annual inspections – Schedule annual inspections with a professional to identify and fix potential issues.
  • Lubrication – Have a professional lubricate the moving parts to reduce wear and tear.

Conclusion

Resetting your garage door opener is a simple yet essential task that ensures the security and functionality of your system. By following these steps, you can easily reset and reprogram your garage door opener. For professional assistance with garage door opener maintenance and repairs, contact Peter and Sons Garage Door Chicago. Our experienced team is ready to help with all your garage door needs. Call us today to schedule an appointment and keep your garage door operating smoothly!

Understanding the Lifespan of a Garage Door Opener

Understanding the Lifespan of a Garage Door Opener

Syncing Your Garage Door Opener Made Easy

Garage door openers are essential for the convenience and security of your home. However, like any mechanical device, they have a limited lifespan. Understanding how long a garage door opener lasts can help you plan for maintenance and eventual replacement. In this article, we will explore the average lifespan of garage door openers, factors affecting their longevity, and tips for extending their life.

Average Lifespan of a Garage Door Opener

Typical Lifespan

The average lifespan of a garage door opener is generally between 10 to 15 years. However, this can vary based on several factors, including the quality of the opener, frequency of use, and regular maintenance.

  • High-quality openers – Can last up to 15 years or more with proper care.
  • Standard openers – Typically last around 10 years.

Signs of Aging

Recognizing the signs of an aging garage door opener can help you determine when it’s time for a replacement. Common indicators include:

  • Frequent breakdowns – Increased need for repairs.
  • Noisy operation – Unusual sounds during operation.
  • Slower response – Delayed opening or closing.

Factors Affecting the Lifespan of a Garage Door Opener

Frequency of Use

How often you use your garage door opener significantly impacts its lifespan. An opener used multiple times a day will wear out faster than one used occasionally.

  • Heavy use – Shortens the lifespan due to increased wear and tear.
  • Light use – Can extend the lifespan if used sparingly.

Quality of Installation

The quality of the installation plays a crucial role in the longevity of your garage door opener. A professional installation ensures that all components are correctly set up and functioning properly.

  • Professional installation – Increases the lifespan by ensuring optimal performance.
  • DIY installation – May lead to premature failures if not done correctly.

Maintenance and Care

Regular maintenance is key to extending the life of your garage door opener. Simple maintenance tasks can prevent major issues and ensure smooth operation.

  • Lubrication – Regularly lubricate moving parts to reduce friction and wear.
  • Inspection – Periodically inspect for loose or worn components.
  • Cleaning – Keep the tracks and sensors clean to prevent malfunctions.

Types of Garage Door Openers and Their Longevity

Chain-Drive Openers

Chain-drive openers are known for their durability and strength. They are suitable for heavy garage doors but can be noisy.

  • Longevity – Typically last around 10 to 15 years.
  • Maintenance – Requires regular lubrication and tightening.

Belt-Drive Openers

Belt-drive openers operate more quietly than chain-drive models and are ideal for homes with living spaces adjacent to the garage.

  • Longevity – Can last up to 15 years or more.
  • Maintenance – Less frequent maintenance compared to chain-drive openers.

Screw-Drive Openers

Screw-drive openers are known for their simplicity and fewer moving parts. They require less maintenance but can be affected by extreme temperatures.

Direct-Drive Openers

Direct-drive openers are relatively new and known for their quiet operation and durability. They have fewer moving parts, which means less wear and tear.

  • Longevity – Can last up to 20 years.
  • Maintenance – Minimal maintenance required compared to other types.

Extending the Lifespan of Your Garage Door Opener

Regular Maintenance

Consistent maintenance is crucial for extending the life of your garage door opener. Simple tasks can prevent major problems.

  • Lubricate moving parts – Apply lubricant to chains, rollers, and hinges regularly.
  • Inspect and tighten – Check for loose bolts and tighten them as needed.
  • Clean the tracks – Remove debris from the tracks to ensure smooth operation.

Timely Repairs

Addressing minor issues promptly can prevent them from escalating into major problems that could shorten the lifespan of your opener.

  • Replace worn parts – Change out worn gears, chains, or belts.
  • Fix misalignments – Adjust tracks and sensors to maintain proper alignment.

Upgrading Components

Upgrading certain components can improve the performance and longevity of your garage door opener.

  • Install a backup battery – Ensures operation during power outages.
  • Upgrade to a higher quality remote – Enhances durability and range.

Conclusion

Understanding how long a garage door opener lasts and the factors that affect its lifespan can help you make informed decisions about maintenance and replacement. With regular care and timely repairs, you can extend the life of your garage door opener, ensuring it serves you reliably for years to come. If you need professional maintenance or are considering a new garage door opener, contact Peter and Sons Garage Door Chicago. Our experienced team is ready to assist with all your garage door needs. Call us today to schedule an appointment and keep your garage door system running smoothly!

Easy Steps to Program Your Garage Door Opener Keypad

Easy Steps to Program Your Garage Door Opener Keypad

Syncing Your Garage Door Opener Made Easy

Programming a garage door opener keypad can enhance the convenience and security of your home. It allows you to open and close your garage door without needing a remote control or key. In this article, we will provide a detailed guide on how to program a garage door opener keypad, ensuring that you can easily and efficiently set up your system.

Understanding the Garage Door Opener Keypad

What is a Garage Door Opener Keypad?

A garage door opener keypad is a device that allows you to open and close your garage door by entering a code on a keypad. It is typically installed outside the garage door and provides keyless access, making it convenient for family members and reducing the need for physical keys or remotes.

Benefits of a Keypad

Using a garage door opener keypad offers several benefits:

  • Convenience – No need to carry a remote or key.
  • Security – Allows you to set a unique code for access.
  • Accessibility – Easy for multiple users to access the garage.

Preparing to Program Your Keypad

Gather Necessary Information

Before you start programming your garage door opener keypad, gather the following information:

  • Garage door opener model – Check your garage door opener model and manufacturer.
  • Keypad model – Ensure you know the brand and model of your keypad.
  • Instruction manual – Have the instruction manual for both the garage door opener and the keypad handy.

Check Compatibility

Ensure that your garage door opener and keypad are compatible. Most keypads are compatible with various garage door openers, but it’s important to verify this information.

Step-by-Step Guide to Programming the Keypad

Step 1: Access the Learn Button

To program your keypad, you first need to access the learn button on your garage door opener:

  • Locate the learn button – The learn button is usually located on the back or side of the garage door opener motor unit.
  • Press the learn button – Press and release the learn button. An indicator light will turn on, signaling that the opener is ready to be programmed.

Step 2: Enter the Programming Mode on the Keypad

Next, you need to enter the programming mode on the keypad:

  • Press the keypad buttons – Enter the default code provided by the manufacturer or a predetermined code (usually found in the instruction manual).
  • Activate the programming mode – Follow the specific instructions for your keypad model to enter programming mode. This might involve pressing a series of buttons in a specific order.

Step 3: Sync the Keypad with the Opener

Once the keypad is in programming mode, sync it with the garage door opener:

  • Enter the new code: On the keypad, enter a new code that you want to use to operate the garage door.
  • Press the enter button – Press the enter button on the keypad to confirm the new code.
  • Test the connection – Wait for the indicator light on the garage door opener to blink or turn off, indicating that the keypad is successfully programmed.

Testing the Keypad

Verify Operation

To ensure the keypad is working correctly, test the operation:

  • Enter the new code – Enter the new code on the keypad and press the enter button.
  • Observe the garage door – The garage door should open or close in response to the code entry.
  • Repeat the test – Test the code multiple times to confirm consistent operation.

Troubleshooting Common Issues

If the keypad does not work after programming, consider these troubleshooting tips:

  • Check the battery – Ensure the keypad has a fresh battery.
  • Repeat the steps – Go through the programming steps again to ensure accuracy.
  • Consult the manual – Refer to the instruction manual for additional troubleshooting tips specific to your model.

Enhancing Security and Convenience

Change Codes Regularly

For enhanced security, change your keypad code regularly:

  • Prevent unauthorized access – Regularly changing the code helps prevent unauthorized access.
  • Update user codes – Update the code if you provide temporary access to guests or service providers.

Add Multiple Keypads

Consider installing multiple keypads for convenience:

  • Front and back access – Install keypads at different entrances for easy access.
  • Separate codes – Assign different codes for each keypad if desired.

Conclusion

Reprogramming your garage door opener keypad can enhance the convenience and security of your home. By following these steps, you can easily set up your keypad and ensure it works seamlessly with your garage door opener. If you encounter any issues or need professional assistance, contact Peter and Sons Garage Door Chicago. Our experienced team is ready to help with all your garage door needs. Call us today to schedule an appointment and ensure your garage door system is operating at its best!

Simple Steps to Change the Battery in Your Garage Door Opener

Simple Steps to Change the Battery in Your Garage Door Opener

Syncing Your Garage Door Opener Made Easy

Changing the battery in your garage door opener is a straightforward task that can save you time and ensure your garage door operates smoothly. Whether your remote control is showing signs of low battery or has stopped working altogether, replacing the battery can often solve the problem. In this article, we will guide you through the steps on how to change the battery in a garage door opener, ensuring seamless functionality.

Identifying the Need for a Battery Change

Signs of a Low Battery

Before diving into the battery replacement process, it’s important to recognize the signs that indicate a low battery in your garage door opener:

  • Decreased range – The remote only works when you are very close to the garage door.
  • Intermittent operation – The remote sometimes fails to open or close the door.
  • Weak or no signal – No response when pressing the remote buttons.

Checking the Battery Type

Different garage door openers use different types of batteries. Check your remote control or the user manual to identify the correct battery type needed for replacement.

Tools and Materials Needed

Gather Necessary Supplies

Before starting the battery replacement, ensure you have the following tools and materials on hand:

  • New battery – Ensure it matches the type specified in your user manual.
  • Small screwdriver – Typically, a Phillips head or flathead screwdriver.
  • Clean cloth – For cleaning the battery compartment if needed.

Step-by-Step Guide to Changing the Battery

Step 1: Open the Remote Control

To begin, you need to access the battery compartment in your garage door opener remote control:

  • Locate the battery cover – This is usually on the back of the remote.
  • Remove the cover – Use a small screwdriver to remove any screws securing the cover, or slide the cover off if it’s a snap-on type.

Step 2: Remove the Old Battery

Once the cover is off, you can proceed to remove the old battery:

  • Take out the old battery – Carefully lift the old battery out of the compartment.
  • Inspect the compartment – Check for any corrosion or debris and clean it with a cloth if necessary.

Step 3: Insert the New Battery

Now, insert the new battery into the remote control:

  • Match the polarity – Ensure the positive and negative ends of the battery match the markings inside the compartment.
  • Place the battery – Insert the new battery securely into the compartment.

Step 4: Close the Remote Control

After inserting the new battery, you need to close the remote control:

  • Replace the cover – Put the battery cover back on and secure it with screws if necessary.
  • Test the remote – Press the buttons to ensure the remote is working properly.

Testing the Garage Door Opener

Verify Operation

After replacing the battery, test your garage door opener to make sure it functions correctly:

  • Test from a distance – Check the range to ensure the remote works from a reasonable distance.
  • Check multiple buttons – If your remote or wall-mounted keypad has multiple buttons, test each one to ensure they all work.

Troubleshooting Common Issues

If the remote does not work after replacing the battery, consider these troubleshooting steps:

  • Recheck the battery installation – Ensure the battery is inserted correctly with the proper polarity.
  • Check the battery type – Verify that you have used the correct battery type as specified in the manual.
  • Consult the manual – Refer to the user manual for additional troubleshooting tips.

Maintenance Tips for Garage Door Opener Remotes

Regular Battery Checks

Regularly check and replace the battery in your garage door opener remote to ensure uninterrupted operation:

  • Annual checks – Replace the battery at least once a year or as needed.
  • Spare batteries – Keep spare batteries on hand to avoid interruptions.

Cleaning the Remote

Keep your remote clean to ensure it functions properly:

  • Wipe regularly – Clean the remote with a soft cloth to remove dirt and grime.
  • Avoid moisture – Keep the remote dry to prevent damage to the internal components.

Conclusion

Changing the battery in your garage door opener remote is a simple task that can ensure smooth and reliable operation. By following these steps, you can easily replace the battery and keep your garage door functioning properly. If you encounter any issues or need professional assistance, contact Peter and Sons Garage Door Chicago. Our experienced team is ready to help with all your garage door needs. Call us today to schedule an appointment and keep your garage door operating smoothly!

Easily Set Up Your Car’s Garage Door Opener

Easily Set Up Your Car's Garage Door Opener

Syncing Your Garage Door Opener Made Easy

Setting up a garage door opener in your car can streamline your daily routine, providing convenient and secure access to your home. This process involves programming your car’s built-in garage door opener system to communicate with your garage door opener. In this article, we will guide you through the steps to successfully set up your garage door opener in your car.

Understanding Your Garage Door Opener System

Identify Your Garage Door Opener Type

Before you begin, it’s important to know the type of garage door opener you have. Most systems fall into one of the following categories:

  • Standard garage door openers – These typically use a remote control for operation.
  • Rolling code openers – These use a changing code for enhanced security.
  • Smart garage door openers – These can be operated via a smartphone app.

Check Your Car’s Compatibility

Ensure that your car is equipped with a built-in garage door opener system, often referred to as HomeLink or Car2U. These systems are usually found in the overhead console or rearview mirror of the car.

Setting Up the Garage Door Opener in Your Car

Step 1: Clear Previous Settings

Before you start programming your car’s garage door opener, clear any previous settings. This ensures a clean slate for the new programming:

  • Press and hold – Simultaneously press and hold the two outer buttons on your car’s garage door opener system until the indicator light begins to flash (usually about 20 seconds).

Step 2: Program the Remote Control

Next, program your car’s system to recognize your garage door opener’s remote control:

  • Hold the remote – Hold the remote control for your garage door opener near the car’s built-in opener system.
  • Press and hold both buttons – Press and hold the button on your remote control and the button you wish to program in your car simultaneously. Continue to hold until the car’s indicator light changes from a slow blink to a rapid blink.

Step 3: Sync with the Garage Door Opener

After programming the remote, sync your car’s system with the garage door opener:

  • Locate the “Learn” button – This button is typically found on the garage door opener motor unit.
  • Press the “Learn” button – Press and release the “Learn” button on the garage door opener. An indicator light will begin to blink, signaling that the system is in programming mode.
  • Press the programmed button in your car – Within 30 seconds, press the button in your car that you programmed. Hold it until the garage door opener light blinks, indicating successful programming.

Testing the Setup

Verify Operation

To ensure the setup was successful, test the garage door opener:

  • Press the car’s programmed button – Press the button you programmed in your car to see if the garage door operates.
  • Check for smooth operation – The garage door should open and close smoothly without any delays.

Troubleshooting Common Issues

If the garage door does not respond, consider these troubleshooting tips:

  • Repeat the programming steps – Sometimes, the process needs to be repeated.
  • Check battery levels – Ensure the remote control and car system have sufficient battery power.
  • Consult the manual: Refer to your car’s and garage door opener’s manuals for specific instructions.

Advanced Features and Settings

Using Smart Garage Door Openers

For those with smart garage door openers, additional features might be available:

  • App integration – Download the relevant app for your garage door opener to control it via your smartphone.
  • Voice control – Integrate with voice assistants like Alexa or Google Assistant for hands-free operation.

Security Enhancements

Enhance the security of your garage door opener system:

  • Rolling code technology – Ensure your system uses rolling codes to prevent hacking.
  • Regular updates – Keep your smart garage door opener’s software updated to patch any security vulnerabilities.

Conclusion

Setting up your garage door opener in your car enhances convenience and security, making your daily routine smoother. By following these steps, you can easily program your car to operate your garage door. If you encounter any issues or need professional assistance, contact Peter and Sons Garage Door Chicago. Our experienced team is ready to help with all your garage door needs. Call us today to ensure seamless access to your home with expert support and service!

Syncing Your Garage Door Opener Made Easy

Syncing Your Garage Door Opener Made Easy

Syncing your garage door opener with a remote or keypad is a crucial step to ensure smooth and reliable operation. Whether you’re installing a new system or troubleshooting an existing one, knowing how to sync a garage door opener can save you time and frustration. This guide provides detailed instructions to help you successfully sync your garage door opener.

Understanding the Basics of Syncing

Before you start the syncing process, it’s important to understand what it entails. Syncing, or programming, involves pairing your garage door opener with a remote control or keypad. This process allows the opener to recognize and respond to the signals from these devices. Typically, syncing is required when you install a new opener, replace the remote, or reset the system.

Tools and Preparation

Gather Necessary Tools

To sync your garage door opener, you’ll need:

  • Remote control or keypad – Ensure it is compatible with your opener.
  • Ladder – For reaching the opener’s control panel.
  • User manual – Helpful for specific instructions related to your opener model.

Safety Precautions

Safety is paramount when working with garage door openers. Follow these precautions:

  • Disconnect power – Unplug the opener before starting any work.
  • Secure the door – Make sure the garage door is fully closed and locked.
  • Read the manual – Familiarize yourself with the opener’s instructions and safety guidelines.

Step-by-Step Syncing Process

Locate the Learn Button

The first step in syncing your garage door opener is to find the learn button on the opener unit. This button is usually located on the back or side of the motor unit. It may be labeled as “Learn,” “Program,” or “Set.”

Press the Learn Button

Press and release the learn button. A light on the opener unit will typically begin to blink, indicating that the unit is in programming mode. The exact behavior of the light may vary depending on the model, so refer to your user manual for specific details.

Sync the Remote Control

To sync a remote control with your garage door opener:

  • Press the remote button – Within 30 seconds of pressing the learn button, press and hold the button on your remote control that you want to program.
  • Wait for confirmation – The light on the opener unit should stop blinking and either stay on or turn off, signaling that the remote has been successfully synced.

Sync the Keypad

If you are syncing a keypad:

  • Enter the PIN – Enter your desired PIN on the keypad.
  • Press the learn button – Within 30 seconds of pressing the learn button on the opener, press the “Enter” button on the keypad.
  • Wait for confirmation – Look for a confirmation signal, such as a light blinking or staying on, indicating that the keypad is successfully synced.

Troubleshooting Common Issues

Remote Control Not Working

If your remote control fails to sync, try these steps:

  • Check the battery – Ensure the remote control has fresh batteries.
  • Repeat the process – Try the syncing process again, ensuring you press the buttons within the required time frame.
  • Clear the memory – If multiple devices are interfering, clear the opener’s memory by holding the learn button for about 10 seconds, then try syncing again.

Keypad Not Working

For issues with the keypad:

  • Verify the PIN – Ensure you are entering the correct PIN.
  • Check the battery – Replace the keypad batteries if necessary.
  • Repeat the process – Retry the syncing steps, making sure to follow the timing precisely.

Opener Not Responding

If the opener itself is not responding:

  • Check the power – Ensure the opener is plugged in and receiving power.
  • Inspect the wiring – Look for any loose or damaged wires.
  • Consult the manual – Refer to the user manual for additional troubleshooting tips specific to your model.

Maintaining Your Synced Garage Door Opener

Regular Testing

Regularly test your synced devices to ensure they are functioning correctly. This helps you catch and resolve any issues early.

Battery Replacement

Replace the batteries in your remote control and keypad regularly to maintain reliable operation. Low batteries can cause intermittent issues and syncing problems.

Professional Maintenance

Consider scheduling annual maintenance with a professional to keep your garage door opener in top condition. They can inspect the system, lubricate moving parts, and address any potential issues before they become major problems.

Conclusion

Knowing how to sync a garage door opener is an essential skill for any homeowner. By following these detailed steps, you can ensure your opener and remote work seamlessly together. If you encounter any difficulties or prefer professional assistance, contact Peter and Sons Garage Door. Our experienced technicians are ready to help with all your garage door needs, from syncing issues to complete system overhauls. Call us today to schedule an appointment and keep your garage door operating smoothly!

Step-by-Step Guide on How to Replace a Garage Door Opener

Step-by-Step Guide on How to Replace a Garage Door Opener

Replacing a garage door opener may seem like a daunting task, but with the right tools and instructions, it can be a straightforward process. Whether your garage door opener has stopped working or you want to upgrade to a more modern system, knowing how to replace a garage door opener can save you time and money. This guide will walk you through each step to ensure a successful replacement.

Preparing for Replacement

Gather Necessary Tools and Materials

Before you begin, ensure you have all the necessary tools and materials. This includes:

  • New garage door opener – Ensure it’s compatible with your garage door.
  • Ladder – For reaching high areas safely.
  • Screwdrivers – Both flathead and Phillips.
  • Wrenches – Various sizes for bolts and nuts.
  • Drill and drill bits – For mounting brackets.
  • Tape measure – For accurate measurements.

Safety Precautions

Safety should always be your top priority. Follow these precautions:

  • Disconnect power – Unplug the garage door opener to avoid electric shock.
  • Secure the door – Ensure the garage door is fully closed and secured.
  • Read the manual – Familiarize yourself with the new opener’s instructions.

Removing the Old Garage Door Opener

Disconnect the Opener

Start by disconnecting the old opener from the power source and the garage door. Follow these steps:

  • Unplug the unit – Ensure there is no power supply.
  • Detach the door – Pull the emergency release cord to disengage the opener from the door.

Remove the Opener

Next, remove the old opener from its mounting bracket:

  • Unscrew the brackets – Use a wrench to remove the bolts holding the opener.
  • Lower the unit – Carefully lower the opener from its position.

Installing the New Garage Door Opener

Mount the Opener

Begin by mounting the new opener:

  • Assemble the unit – Follow the manufacturer’s instructions to assemble the opener.
  • Install the bracket – Secure the mounting bracket to the ceiling or wall.
  • Attach the opener – Mount the opener to the bracket securely.

Connect the Opener to the Door

Once the opener is mounted, connect it to the garage door:

  • Attach the arm – Connect the door arm to the trolley on the opener.
  • Secure the connections – Ensure all bolts and screws are tight.

Wiring the Opener

Proper wiring is crucial for the opener to function correctly:

  • Install the sensors – Mount the safety sensors on either side of the door, aligning them correctly.
  • Connect the wires – Follow the wiring diagram in the manual to connect the opener to the power source and sensors.
  • Test the sensors – Ensure the sensors are working by closing the door and breaking the sensor beam.

Testing the New Garage Door Opener

Power Up the Opener

Plug in the new opener and turn on the power. Follow these steps to test its functionality:

  • Test the remote – Use the remote control to open and close the garage door.
  • Adjust settings – If necessary, adjust the force and limit settings on the opener.
  • Ensure smooth operation – Check that the door opens and closes smoothly without any hitches.

Troubleshooting Common Issues

If you encounter any problems, consider these troubleshooting tips:

  • Check the wiring – Ensure all connections are secure and correct.
  • Adjust the sensors – Realign the safety sensors if the door doesn’t close properly.
  • Refer to the manual – Consult the manual for specific troubleshooting steps.

Conclusion

Knowing how to replace a garage door opener can save you the hassle and cost of hiring a professional. By following these detailed steps, you can ensure a smooth and safe installation process. If you run into any issues or prefer professional assistance, don’t hesitate to contact Peter and Sons Garage Door. Our experienced technicians are ready to help with all your garage door needs. Whether it’s a simple repair, routine maintenance, or a complete opener replacement, we’ve got you covered. Call us today to schedule an appointment and keep your garage door functioning perfectly!

Top Tips for Extending the Lifespan of Your LiftMaster Garage Opener Battery

Top Tips for Extending the Lifespan of Your LiftMaster Garage Opener Battery

Are you tired of having to replace the battery in your LiftMaster garage door opener? 

Now, we’ll look at the top tips for prolonging the life of your LiftMaster garage door opener battery, ensuring that your garage door operates smoothly and reliably for years to come.

Before we look at the tips, let’s first understand the role of the battery in your LiftMaster garage door opener. 

The battery acts as a back-up power source, allowing your garage door to operate in the event of a power failure. It’s important to maintain the battery properly to ensure it remains functional when you need it most.

Prolonging Your LiftMaster Garage Opener Battery

Tip 1: Regular Maintenance Checks

One of the most effective ways to extend the lifespan of your LiftMaster garage opener battery is to perform regular maintenance checks. Inspect the battery for any signs of corrosion, leaks, or damage, and replace it if necessary. 

Clean the battery terminals regularly to ensure a strong connection and prevent power loss.

Tip 2: Keep the Battery Charged

To maintain optimal performance, it’s crucial to keep your LiftMaster garage opener battery charged at all times. Most LiftMaster models come with a charging indicator that alerts you when the battery is low. 

Make sure to recharge the battery promptly to avoid depletion and ensure it’s ready to kick in during power outages.

Tip 3: Protect from Extreme Temperatures

Extreme temperatures can have a significant impact on the lifespan of your LiftMaster garage opener battery. Avoid exposing the battery to extreme heat or cold, as it can lead to premature failure. 

If your garage is not climate-controlled, consider insulating the area or investing in a battery heater to protect the battery from temperature fluctuations.

Tip 4: Use Energy-Efficient LED Lights

Believe it or not, the type of light bulbs you use in your garage can affect the lifespan of your LiftMaster garage opener battery. Opt for energy-efficient LED lights instead of traditional incandescent bulbs. 

LED lights consume less energy, reducing the strain on your battery and extending its lifespan.

Tip 5: Limit Battery Drain

Lastly, it’s important to limit battery drain to prolong the lifespan of your LiftMaster garage opener battery. 

Avoid leaving the garage door partially open for extended periods, as it can drain the battery unnecessarily. Additionally, minimize the use of accessories like keypads and remote controls to conserve battery power.

How to Ensure Reliable Operation of Your LiftMaster Garage Opener Battery

You can ensure the continued reliable operation of your garage door by following these top tips for extending the life of your LiftMaster garage door opener battery. 

Regular maintenance checks, proper charging, temperature control and energy efficient practices are key to maximising the life of your battery and avoiding unexpected failures. Through taking proactive measures, you can enjoy peace of mind knowing that your garage door will always be there for you when you need it most.

Do you want to upgrade your garage door system for maximum efficiency and reliability? 

Contact Peter and Sons Construction today to explore our range of garage door installation and maintenance services. 

From the installation of energy-efficient LiftMaster garage doors to expert advice on battery maintenance, our team is here to help you improve the functionality and longevity of your garage door system. 

Visit our website or call us now to schedule a consultation and take the first step towards a smoother, more reliable garage door experience with Peter and Sons Construction.

Fixing Common LiftMaster Door Opener Battery Issues

Fixing Common LiftMaster Door Opener Battery Issues

Weak or Intermittent Operation

Experiencing problems with your garage door can be frustrating, especially when you’re in a hurry. Your LiftMaster door opener relies on a battery for its smooth operation, but like all batteries, it can develop issues over time. Understanding these problems and how to deal with them can save you time and trouble. Let’s explore the most common problems and their solutions for your LiftMaster door opener battery.

Common Problems and Solutions

Weak or Intermittent Operation

Cause – A weak or failing battery often causes the door opener to operate slowly or intermittently.

Solution – Replace the battery with a new one compatible with your LiftMaster model. Ensure it is fully charged before installation.

No Response from the Door Opener

Cause – If your door opener doesn’t respond at all, the battery may be completely drained or faulty.

Solution – Check the battery connections to ensure they are secure. If the connections are fine, try charging the battery or replacing it with a new one.

Short Battery Life

Cause – A short battery life can be due to frequent use, extreme temperatures, or an old battery.

Solution – Consider upgrading to a higher-capacity battery or implementing regular maintenance routines to extend battery life.

Battery Overheating

Cause – Overheating can occur if the battery is exposed to prolonged high temperatures or if it is overcharged.

Solution – Ensure proper ventilation around the battery compartment and avoid overcharging. If overheating persists, consider replacing the battery with one designed for higher temperatures.

Corrosion on Battery Terminals

Cause – Corrosion on the battery terminals can disrupt the flow of electricity, leading to poor performance or failure of the door opener.

Solution – Clean the battery terminals with a mixture of baking soda and water. Ensure that the terminals are completely dry before reconnecting the battery.

Ensuring Smooth Operation of Your LiftMaster Door Opener

Dealing with problems related to your LiftMaster door opener battery can be frustrating, but with the right knowledge and solutions, you can quickly restore its functionality. Regular maintenance and periodic checks are key to preventing future problems with your LiftMaster garage door opener battery.

If issues persist despite troubleshooting, consider seeking professional assistance to ensure proper diagnosis and repair. For expert help with your LiftMaster door opener or any other home improvement needs, contact Peter and Sons Construction. Our experienced team specializes in garage door maintenance, repair, and installation.

Conclusion

With these tips and the support of Peter and Sons Construction, you can keep your LiftMaster garage door opener running smoothly and efficiently for years to come. Let us ensure that your garage door operates seamlessly, providing convenience and safety to your home. Contact Peter and Sons Construction today to arrange an appointment or to learn more about our services.

How to Perform a Lift Master Battery Replacement?

How to Perform a Lift Master Battery Replacement?

The battery in your Lift Master garage door opener ensures smooth operation, even during power outages. Over time, the battery can lose its charge, causing operational issues. Knowing how to replace it yourself can save you both time and money.

Many homeowners face the challenge of a Lift Master battery replacement. We’ll walk you through the process, provide helpful tips, and answer common questions to ensure your garage door opener is back in top shape in no time.

Tools and Materials You’ll Need

To replace a Lift Master battery, you’ll need:

  • A new battery compatible with your Lift Master model
  • A Phillips head screwdriver
  • Safety gloves
  • A stepladder (if your opener is mounted high)

Step-by-Step Guide to Replacing a Lift Master Battery

Step 1: Safety First

  • Disconnect the Power – Unplug the garage door opener to prevent accidental operation.
  • Wear Gloves – Safety gloves protect your hands from sharp edges and residue.

Step 2: Locate the Battery Compartment

  • Find the Compartment – Usually located on the side or back of the garage door opener. Refer to your owner’s manual if unsure.
  • Open the Compartment – Use your screwdriver to remove the screws securing the battery compartment cover.
  • Remove the Cover – Carefully take off the cover and set it aside.

Step 3: Remove the Old Battery

  • Disconnect the Battery – Lift Master batteries typically have connectors that can be gently pulled apart. Note the connections for easy reattachment.
  • Remove the Battery – Take out the old battery and dispose of it according to local regulations.

Step 4: Insert the New Battery

  • Insert the New Battery – Place the new battery into the compartment, ensuring it fits snugly.
  • Reconnect the Battery – Attach the terminals to the new battery as they were connected to the old one. Ensure they are secure.

Step 5: Close the Compartment

  • Replace the Cover – Put the battery compartment cover back in place.
  • Secure with Screws – Use your screwdriver to tighten the screws and secure the cover.

Step 6: Reconnect the Power

  • Plug in the Opener – Reconnect the garage door opener to the power supply.
  • Test the Opener – Press the remote or wall button to ensure the opener works properly with the new battery.

Tips for a Smooth Battery Replacement

  • Check Compatibility – Ensure the new battery is compatible with your specific Lift Master model.
  • Regular Maintenance – Check the battery annually, especially in areas with frequent power outages.
  • Proper Disposal – Dispose of the old battery at a designated recycling center or battery disposal site.

Troubleshooting Common Issues

  • Opener Doesn’t Work – Ensure the battery connections are secure and the opener is plugged in.
  • Weak Operation – Check if the battery is fully charged. Some new batteries need a full charge before optimal performance.
  • Error Lights – Refer to your user manual for specific error codes and troubleshooting tips.

Maintaining Your Lift Master Garage Door Opener

Regular maintenance extends the life of your garage door opener:

  • Lubricate Moving Parts – Keep chains, rollers, and hinges well-lubricated to reduce wear.
  • Inspect for Wear – Regularly check cables, springs, and other parts for wear and replace them as needed.
  • Test the Balance – Ensure the door opens and closes smoothly by testing the balance periodically.

Ensuring Your Garage Door Opener’s Longevity

Knowing how to perform a Lift Master battery replacement is a useful skill that can save you time and money. Prioritize safety, check compatibility, and dispose of old batteries properly. Keeping your garage door opener in good condition ensures the security and convenience of your home.

For more detailed guides and tips on maintaining your home appliances, subscribe to our blog. If you have questions or need expert help with your Lift Master garage door opener, contact Peter and Sons Construction. Our experienced team provides top-notch services, including garage door maintenance, repairs, and installations.

Contact Peter and Sons Construction today for reliable and professional assistance to keep your home in the best condition. We are here to help with all your home improvement needs.