Garage Door Not Holding Heat? Try This Foam Board Insulation Fix

September 2025

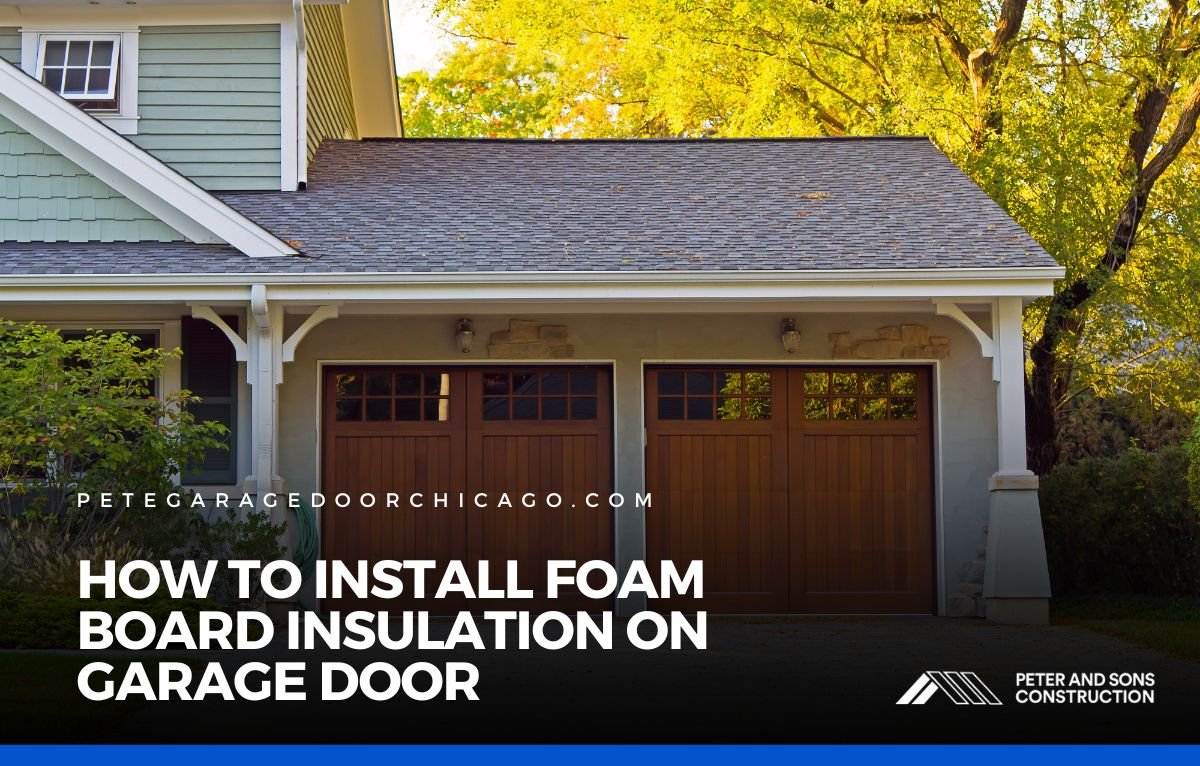
Your garage might look sealed, but if the door panels are bare metal, you’re still losing heat by the hour. Foam board insulation solves that. It’s rigid, lightweight, and made to slow down temperature loss in spaces like garages that face extreme swings in weather.

This guide walks you through how to install foam board insulation on your garage door—clean, tight, and built to last.

Why Foam Board Insulation Works for Garage Doors

Garage doors may look solid, but they’re one of the weakest links in maintaining a stable indoor temperature. That’s especially true if your garage is attached to your home or doubles as a workspace. Most standard garage doors are built with little to no insulation. As a result, outside air seeps in, indoor heat escapes, and your energy bills slowly creep up—especially during summer and winter.

Foam board insulation is one of the most effective and affordable ways to solve this. Unlike blanket insulation or loose-fill materials, foam board panels offer high insulating power with minimal bulk. They’re rigid, moisture-resistant, and easy to cut to size, making them ideal for garage door retrofits. Once installed, they help regulate interior temperature, reduce noise, and even add a bit of structural support to older panels.

Before You Begin: What You’ll Need

Prepping correctly is key. Don’t rush into cutting and sticking panels until you’ve made sure the surfaces are clean and the materials are the right type.

Required Materials:

  • Rigid foam board insulation (usually polyisocyanurate or polystyrene)
  • Measuring tape
  • Straightedge or T-square
  • Utility knife or insulation cutter
  • Double-sided construction tape or adhesive glue
  • Degreaser or all-purpose cleaner
  • Rag or microfiber towel

Optional but helpful:

  • Aluminum foil tape (to seal panel edges)
  • Insulation retaining clips
  • Gloves and protective eyewear

You can purchase foam board insulation panels pre-cut for garage doors, or buy larger sheets and cut them down yourself. If going the DIY route, opt for 1-inch thick panels for a good balance between R-value and ease of installation. Most garage doors have recessed panels that are perfect for holding these snugly without interfering with door movement.

Step-by-Step: How to Install Foam Board Insulation on a Garage Door

Start by opening your garage door fully and locking it in place. This gives you better access to each section without worrying about the door shifting.

  1. Measure the Panels Carefully

Each panel of your garage door likely has a recessed area. That’s where the foam boards will go. Measure the width and height of each inset individually—don’t assume they’re all identical, especially on older doors.

When you’re dealing with foam board, precise cuts matter. A poorly cut panel may bulge out, reduce the seal, or come loose over time. Always measure twice before trimming, and label each cut panel if you’re doing them in batches.

  1. Prep the Surface

Use a degreaser or mild soap solution to clean each door panel. Any dust, grease, or residue can weaken the bond between the foam board and the door. Dry thoroughly using a lint-free cloth. This step is often rushed, but skipping it almost always leads to panels falling off later.

  1. Cut and Test-Fit Each Panel

Lay your foam board on a clean surface. Using a straightedge and a utility knife, cut each piece to match your measurements. A snug fit is ideal; tight enough to stay in place without bowing the panel or sticking out.

Before applying any adhesive, dry-fit the insulation into the door panel. This test run helps catch errors before they become permanent.

  1. Apply Adhesive and Press Firmly

If using double-sided construction tape, apply strips around the back edges of the foam panel. For adhesive glue, apply thin, even beads in a grid or zigzag pattern. Either way, press the panel into the door recess and hold it for 30–60 seconds to make sure it sets.

Work from the top down to maintain balance. Starting at the bottom could add stress to the lower sections as you go.

  1. (Optional) Seal Edges with Foil Tape

If you live in a region with extreme temperature swings, aluminum foil tape adds extra protection. It seals any air gaps, prevents moisture intrusion, and keeps the edges clean. It’s especially useful for older garage doors or uneven surfaces.

What Comes Next: Benefits After Installation

If installed correctly, you’ll feel the difference fast. Winter air won’t sneak in through the metal, and summer heat won’t cling to the panels. Expect the internal temperature to stay more stable, especially overnight or during heatwaves.

Beyond temperature control, insulation also reduces outside noise. If your garage faces a busy street or noisy neighbors, foam board panels help mute the racket. It also improves door performance—less vibration, fewer rattles, and a quieter motor cycle.

Some homeowners even report a modest improvement in their energy bills. If your garage is attached to a climate-controlled part of your home, insulating the door helps retain that heating or cooling.

Mistakes That Make Panels Fall Off

While foam board insulation offers clear benefits, even small mistakes during installation can undo your hard work. Many homeowners underestimate how precise the process needs to be. If your panels keep falling off, chances are one of these common issues is to blame:

Dirty surfaces: Oil, dust, or humidity can prevent adhesives from sticking.

Wrong tape or glue: Basic double-sided tape isn’t strong enough. Use adhesives rated for foam and temperature fluctuations.

Panels too tight or too loose: Tight panels may bend or pop out. Loose panels shift around and lose their seal.

Skipping the test fit: Even small misalignments lead to poor insulation and aesthetic issues.

It’s also worth checking how your garage door operates after installation. While foam board doesn’t add much weight, it can affect balance if your door opener is already working hard. If the door strains or hesitates, stop and call a pro to check the spring tension.

Should You DIY or Call for Backup?

If your garage door has curved panels, inset hardware, or if you’re not comfortable working with cutting tools, it’s best to hire someone. Professionals can cut custom foam pieces and use commercial-grade adhesives that last longer.

They can also inspect the door for structural issues that insulation alone won’t fix, like cracked panels, worn weather seals, or bent tracks. In some cases, they may recommend combining foam board insulation with a full door upgrade for the best long-term results.

Wrapping Up

Foam board insulation gives your garage door a major performance boost without needing a full door replacement. It’s lightweight, effective, and relatively simple to install. With a weekend of work, you can turn a drafty garage into a more comfortable, quieter, and energy-smart space.

If you want that done right—with no cutting errors, mess, or trial-and-error—Peter and Sons can help. Our team handles garage door insulation from prep to finish, ensuring every panel fits clean and holds strong for years.

How to Attach Garage Door Insulation Panels (So They Actually Stay Put)

Garage door insulation kits often advertise quick installs—“Just stick and go!” But if you want the panels to actually stay put through winter cold, summer humidity, and daily movement, it’s worth slowing down and doing it right. Attaching insulation panels isn’t just about taping them on. It’s about proper prep, secure contact, and alignment that doesn’t mess with your door’s balance.

Here’s how to get a clean, lasting result that improves your garage’s comfort without messing up how your door works.


Why Panel Attachment Matters More Than You Think

Most garage doors are made from metal—great for durability, not so great for thermal control. Insulation panels are the fix, but if they’re installed wrong, they won’t help much. Panels that pop out, sag, or shift over time can interfere with door mechanics or let heat leak right back out. Worse, poor installation might void your insulation kit’s warranty.

That’s why solid panel attachment is key. With the right prep and placement, your insulation stays effective and low-maintenance for years.


What You’ll Need

You don’t need a contractor’s toolbox to get this right. Just a handful of basics:

  • Garage door insulation panels (foil-backed or foam)
  • Tape measure
  • Utility knife or insulation shears
  • Straightedge or level
  • Degreaser or soapy cleaner
  • Rag or towel
  • Double-sided adhesive tape or mounting clips (depending on your kit)
  • Optional: Foil tape to seal edges

Pro tip: Choose insulation designed for garage doors—not leftover house insulation. Garage kits are lighter and cut to flex slightly with the door’s movement.


Step-by-Step: How to Attach Insulation Panels Securely

  1. Measure the Recessed Panels

Most garage doors have a slightly recessed panel structure. That’s where the insulation should sit—flush, not overlapping. Measure both the height and width of each recessed section. Even small differences matter if the door has aged or warped slightly.

Avoid guessing or eyeballing. Write the measurements down as you go. If the panel gaps are inconsistent, plan to trim each insulation panel individually.

  1. Prep and Clean the Surface

This is where most shortcuts go wrong. A dusty, oily, or cold panel surface will not hold adhesive well. Clean every panel using degreaser or mild dish soap diluted with water. Rinse and dry thoroughly. If the temperature is below 50°F, consider warming the garage slightly to help the adhesive grip better.

Clean surfaces = long-term stick.

  1. Cut Panels to Fit (Don’t Jam Them)

Using a straightedge and utility knife, cut each insulation panel to your measured size. Aim for a snug fit that presses in lightly without bowing the metal. For foil-faced panels, keep the reflective side facing the direction recommended—usually outward to bounce back radiant heat.

Jamming oversized panels in will just push them out later or unbalance your door. Undersized ones leave air gaps. You want just-right.

  1. Choose the Right Mounting Method

There are two popular ways to attach insulation panels:

  • Double-sided adhesive tape: Ideal for clean metal surfaces. Apply tape around the edges of the insulation panel. Press it into the garage door slowly, starting at the top and smoothing down.
  • Adhesive clips: Some kits come with plastic retainer clips that pierce through the panel and anchor into the door. These are great for movement-heavy doors or humid environments.

Pro tip: Wear gloves when handling foil-backed foam. Some panels have fiberglass fibers or edges that can irritate your hands.

  1. Seal Around the Edges (Optional)

If there are slight air gaps between the insulation and panel edge, seal them using aluminum foil tape. This boosts the insulation’s performance and gives it a clean, professional look. Just avoid taping over any hinges or joints.

If you’re dealing with curved corners or odd shapes, cut small triangles to fill in corners and tape around them. Don’t leave open air pockets if you can help it.

  1. Check Door Balance

Insulation adds a few pounds to your door. While most modern openers can handle the extra weight, it’s smart to test the door manually. Open it halfway and let go—if it slams down or shoots up, the spring tension is off.

Uneven movement? Call a pro to adjust the spring tension safely.


What Makes Panels Fall Off

Even with high-quality insulation kits, panels can still fall off if the installation steps are rushed or skipped. One of the most common reasons is poor surface prep. Dust, grease, or moisture left on the garage door will prevent adhesive tape from sticking properly. If the surface isn’t completely clean and dry, the panels may detach within days—especially during temperature changes.

Another issue is using the wrong adhesive. Household glue or low-grade tape won’t hold up to the extreme hot-and-cold cycles garage doors face. That’s why it’s important to use tape or clips designed specifically for insulation kits. Incorrectly sized panels can also cause problems. Panels that are too tight will bow or pop out when the door moves, while panels that are too loose leave gaps that reduce effectiveness and increase the chances of falling.

Lastly, some homeowners forget to account for the garage door’s motion. A poorly balanced door or one with tight clearances can snag on panels as it opens and closes, loosening them over time. Avoid these common mistakes, and your insulation will hold up longer and work better.


Post-Installation Benefits

Once installed properly, insulation panels offer immediate benefits. The most noticeable is temperature control. In winter, your garage stays warmer for longer without constant reheating. In summer, the panels help reflect heat and reduce the greenhouse effect inside the garage. This is especially valuable if your garage connects to your living space—keeping energy costs down and indoor comfort up.

Sound insulation is another plus. The panels help muffle outside noise from traffic, neighbors, or wind. If your garage is used as a workspace, gym, or laundry area, you’ll appreciate the quieter environment. You’ll also notice a reduction in dust and drafts, since insulation helps tighten up air gaps and keeps debris from sneaking in.

Beyond comfort, this upgrade can also improve your home’s resale appeal. A well-insulated, clean-looking garage door is a subtle signal of home care and energy efficiency—something buyers tend to value.


Know When to Call for Backup

If your garage door has decorative inlays, custom paneling, or non-standard shapes, it may be worth getting help. Likewise, if your opener is old or struggles with balance, a professional can safely adjust it and install the insulation without compromising function.

At Peter and Sons, we handle every detail—from cleaning and cutting to proper mounting and spring adjustment. Whether your goal is energy savings or comfort, we make sure your garage door performs better and looks cleaner.

Installing Insulation Panels the Right Way

Even after sealing the sides and top of your garage door, the temperature might still feel off. That’s often because the panels themselves are letting heat escape or absorb too much from the sun. Most garage doors are made of metal, which easily conducts heat and cold—turning the space into an icebox in winter or a heat trap in summer. To fix that, you need to insulate the door itself. Installing garage door insulation panels gives the entire surface a barrier, helping your garage stay more comfortable all year round.

Why Panel Insulation Makes a Big Impact

Garage doors are usually made from steel, aluminum, or fiberglass—all excellent conductors of heat and cold. Even when the seals are tight and the gaps are closed, those materials work against you. Heat escapes easily in winter, and in the summer, the sun’s rays heat the panels like a skillet.

That’s where insulation panels come in. They’re lightweight, cut to size, and designed to slow heat transfer. The right install can reduce your garage’s temperature swings by 10–20°F, making it more usable year-round.

What You’ll Need

Insulating a garage door doesn’t require fancy tools. Most of what you need is available at your local hardware store, or comes bundled in a quality insulation kit.

  • Garage door insulation panels (foam board or reflective foil-backed)
  • Measuring tape
  • Straightedge or level
  • Utility knife or shears
  • Double-sided tape or adhesive clips
  • Degreaser or all-purpose cleaner
  • Rag or towel

Optional:

  • Aluminum foil tape for sealing edges
  • Gloves (to avoid skin irritation from some insulation materials)


Step-by-Step: How to Install Garage Door Insulation Panels

  1. Measure the Panels

Every garage door panel has a recessed section that varies slightly in size. You don’t want insulation sticking out or bulging. Use your measuring tape to note the width and height of the inset area, not the outer frame.

Take measurements twice for accuracy, especially if the door is older and panels aren’t identical. If you’re using a pre-cut kit, double-check dimensions before trimming.

  1. Clean the Panel Surfaces

Before sticking anything on the door, clean each panel’s surface thoroughly. Dust, oil, and residue from previous weather changes can affect adhesion. Use a degreaser or a mild soapy solution. Wipe it dry with a clean towel. This step ensures that the insulation stays put for the long haul.

  1. Cut the Insulation Panels to Fit

Using a straightedge and utility knife (or shears), trim the insulation panels to match your measurements. Aim for a snug fit that slides into the recess without being forced. If you’re using foil-backed panels, make sure the reflective side is facing the direction recommended by the manufacturer—usually outward to reflect heat.

Don’t worry if your cuts aren’t laser-perfect. Small gaps can be sealed with aluminum foil tape later.

  1. Attach the Panels Securely

There are two common ways to fix insulation panels in place:

  • Double-sided tape: Apply strips around the back of the insulation panel. Press it firmly into place, starting from one edge and working across.
  • Clips (included in some kits): These attach directly to the panel and allow the insulation to flex slightly with door movement. They tend to hold up better in humid environments.

Tip: Start at the top panel and work your way down. This keeps weight distribution even as you go.

  1. Seal the Edges (Optional, But Helpful)

If there’s space between the panel and insulation, use foil tape to seal the edges. This adds a layer of air resistance and makes the install look cleaner. Be careful not to block any moving hinges or hardware with tape or insulation material.

  1. Test Door Movement and Balance

After installing all the panels, test the garage door. Open and close it manually a few times. Listen for dragging, resistance, or uneven weight. Insulation adds a bit of mass to the door, and while it’s usually minimal, older openers might struggle.

If the door feels heavier or misaligned, you may need to adjust the tension springs—best handled by a garage professional for safety.

What to Expect After Installation

Done right, insulation panels make an immediate difference. You’ll feel the temperature stabilize within a day, especially in attached garages. In winter, the space holds warmth longer. In summer, it won’t trap heat as quickly.

The added insulation also dampens sound. That means less road noise creeping in and quieter operation overall. If your garage doubles as a workspace or laundry area, that boost in comfort and quiet goes a long way.

Mistakes to Avoid

  • Skipping surface prep: Panels won’t stick to dirty or oily doors.
  • Forcing oversized panels: Bulges may interfere with opening or loosen the adhesive over time.
  • Blocking moving parts: Keep insulation away from springs, hinges, and track systems.
  • Using interior-only materials: Garage doors need materials rated for extreme temperatures and humidity shifts.

Warning Signs You Need a Garage Door Specialist

Some garage doors have irregular panels, curved designs, or pre-installed hardware that makes insulation tricky. If your panels don’t sit flush, or if you’re unsure about the door’s weight after installation, it’s safer to get help.

A garage specialist can assess insulation compatibility and make adjustments that preserve your opener’s performance. They’ll also make sure the insulation aligns with the door’s movement so nothing shifts or tears after repeated use.

Final Thoughts

Installing garage door insulation panels is one of the most cost-effective upgrades you can make. It improves comfort, saves energy, and adds durability to a space you use daily. If you’ve already sealed the edges and the temperature still fluctuates wildly, it’s time to give the panels the attention they deserve.

And if you want a clean, balanced, and efficient finish without trial and error—Peter and Sons is always ready to help.

Tired of a Freezing or Boiling Garage? Insulate That Metal Door

A metal garage door without insulation turns your garage into an oven in summer and an icebox in winter. Heat transfers through the panels fast, making it tough to control temperature or protect anything stored inside. If the space feels unbearable during extreme weather or your utility bills keep climbing, the door could be the weak spot. Insulating it improves comfort, saves energy, and makes your garage usable year-round.

We’re breaking down how metal garage door insulation actually delivers results—no gimmicks, no shortcuts.

Why Metal Garage Doors Lose Heat Fast

Metal conducts heat fast. That means cold air gets pulled in during winter and heat soaks through in summer. With no resistance, the temperature inside your garage changes quickly, making the space uncomfortable or even unusable.

Most basic metal doors are single-layer steel or aluminum with no backing. Once the outside temperature shifts, the inside does too. If your garage shares a wall with your home, it also affects the indoor temperature next to it.

Uninsulated metal also amplifies noise. Traffic, wind, and outdoor sounds transfer right through. So without insulation, your garage isn’t just losing comfort; it’s losing control.

Signs You Need to Insulate Your Metal Garage Door

Most homeowners notice these problems long before they realize what’s causing them. If you’re dealing with any of the following, metal garage door insulation may be overdue:

  • Your garage gets too hot or cold depending on the season
  • The interior wall next to the garage is drafty
  • Stored items are getting moisture damage or warping
  • You hear street noise or wind loud and clear through the garage door
  • Your energy bills are rising and your HVAC system is working harder

Insulating the rest of your home but skipping the garage door is like wearing a winter coat with no zipper. It’s almost working, but not enough.

What Makes Good Garage Door Insulation?

There’s more than one way to insulate a metal door, but some materials do a better job depending on your goal. The top three options for metal garage door insulation are:

Rigid Foam Panels

These offer the highest R-value per inch. They’re cut to fit and glued directly to the garage door panels. The result is a clean look and long-lasting performance.

Reflective Foil Insulation

Best for hot climates, this foil-faced barrier reflects heat away from the surface. It doesn’t absorb heat—it deflects it. Not ideal for winter climates, but helpful in warmer regions.

Garage Door Insulation Kits

These pre-measured systems include foam boards or batting with clips or adhesives. They’re fast to install but may not last as long without reinforcement.

If your goal is noise reduction, rigid foam does better than foil. If your goal is blocking radiant heat in summer, foil might be worth it. But if you’re dealing with both heat and cold throughout the year, foam panel systems offer the most balance.

How to Install Metal Garage Door Insulation the Right Way

Before you install anything, make sure the surface is clean. Dirt, oil, or spider webs will prevent adhesives from sticking. Use a degreaser and a dry cloth to wipe down each panel.

Start by measuring each section of your garage door. Most doors have several horizontal panels, each with its own recessed area. Cut the insulation material slightly smaller than each space so it sits snug but doesn’t bulge. Use high-strength adhesive or mechanical fasteners made for garage doors.

If you’re using a kit, follow instructions carefully. A loose fit won’t work long-term, and poor placement can interfere with your door’s operation.

When in doubt, call in a pro. Insulating garage doors isn’t a high-risk job, but a bad install can cause binding, misalignment, or even damage to your opener system.

Why Metal Garage Door Insulation is Worth It

People don’t always think about garage doors when upgrading insulation. That’s a mistake. Insulating a metal garage door improves comfort and efficiency across the board.

  • Keeps heat inside during winter and blocks it in summer
  • Reduces energy costs by up to 15% when combined with wall insulation
  • Protects stored items from extreme temperature swings
  • Lowers noise from outside traffic or wind
  • Makes the garage more usable for hobbies or work year-round

You don’t have to fully convert your garage into a finished room to make insulation worth it. Even a simple panel upgrade can help your home perform better and feel more comfortable.

Metal vs. Wood: Why Metal Doors Need Extra Help

Wood is naturally thicker and more resistant to temperature changes than metal. Even without insulation, it slows heat loss better and absorbs sound more effectively. Metal, while stronger and lower maintenance, doesn’t offer that built-in buffer.

A metal garage door needs insulation to stay balanced. Without it, heat and cold pass through fast, and condensation can build up on the inside surface. That leads to moisture issues and rising energy costs.

If your garage came with a basic metal door, odds are it was installed without insulation. That gap is what separates a well-functioning space from one that constantly leaks air and noise.

Don’t Let Your Garage Door Work Against You

Metal garage door insulation isn’t about overbuilding. It’s about controlling what you can and making sure your home runs smarter. If you want quieter mornings, lower energy bills, and better protection for your garage gear, insulating the door is a smart move.

If you’re not sure what type of insulation fits your garage or don’t want to deal with uneven cuts and messy adhesives, Peter and Sons can help. We’ve insulated hundreds of metal garage doors across Chicago—clean installs, no guessing, and materials that last. We treat your garage like part of your home, because that’s exactly what it is.

How Garage Door Insulation Affects Noise Reduction and Comfort

A noisy garage door can be frustrating. The rattling panels, loud vibrations, or the sound of traffic spilling into your garage can make the space less comfortable to use. 

Many homeowners looking to improve this situation often ask how garage door insulation affects noise reduction

The answer is simple: insulated doors are quieter, sturdier, and help create a calmer environment inside the garage and nearby rooms. 

Let’s break down why that is and what options you have.

How Garage Door Insulation Affects Noise Reduction

Noise travels easily through thin materials. Standard garage doors, especially single-layer steel doors, act almost like drums—vibrations pass through them with little resistance. 

Adding insulation changes that by creating a dense barrier. The extra layers reduce vibration, block outside sounds, and muffle the movement of the door itself.

So, how garage door insulation affects noise reduction comes down to two things: it blocks external noises like traffic, barking dogs, or neighbors’ activities, and it softens the internal sounds of the door opening and closing. 

If your garage is attached to the house, the difference is especially noticeable in nearby living spaces.

Why Are Insulated Garage Doors Quieter?

Insulated garage doors are quieter because they are built with multiple layers—typically steel, insulation, and a backing material—that add both weight and stiffness. 

This solid construction prevents the panels from rattling and reduces the echo often heard inside non-insulated garages. 

For example, a single-layer steel door can shake and vibrate with every opener cycle, creating a hollow banging sound. 

A double-layer door with polystyrene foam feels sturdier and cuts down on those noises, while a triple-layer door with polyurethane insulation offers the best performance by absorbing vibrations and dampening sound significantly. 

This layered design clearly shows how garage door insulation affects noise reduction by adding mass, rigidity, and a buffer between the source of the noise and your living space.

What Types of Insulation Work Best for Soundproofing?

Not all insulation is created equal when it comes to reducing noise. Here are the most common types and how they perform:

  • Polystyrene Panels: Basic foam sheets. Good at reducing some vibration but not as effective for high-level noise reduction.
  • Polyurethane Foam: Denser and stronger. This type bonds directly to the garage door panels, which minimizes flexing and rattling. It’s the best option if noise reduction is a priority.
  • Reflective Foil Insulation: Designed more for radiant heat control. While it offers some sound dampening, it’s not as effective as foam-based options.

If your main concern is how garage door insulation affects noise reduction, polyurethane is the clear winner.

Can Insulation Reduce Noise From the Garage Opener?

Yes, but only to a point. Much of the noise from a garage comes from the opener and the hardware (chains, tracks, rollers). 

Insulation helps reduce the echo inside the garage, but it won’t completely eliminate mechanical sounds. 

For the quietest results, pair insulated doors with a belt-drive opener and nylon rollers. 

This combination significantly cuts down on the rumbling and squeaking that homeowners often complain about.

What About Outside Noise?

Another way to look at how garage door insulation affects noise reduction is through outside sources. If your garage faces a busy road, an insulated door makes a big difference. 

The dense layers absorb much of the noise before it reaches inside. This is particularly valuable if your garage doubles as a workshop, gym, or play area.

For example, a homeowner living on a street with constant traffic noticed that replacing a hollow steel door with a polyurethane-insulated model reduced indoor noise levels by almost half. 

While it won’t block out everything, the improvement is significant enough to change how comfortably the garage can be used.

Added Comfort Benefits of Insulated Doors

Noise reduction is only part of the story. Insulated garage doors also regulate temperature, improve energy efficiency, and add durability. 

Together, these benefits create a garage space that’s not only quieter but also more practical year-round.

Some key advantages include:

  • More Comfortable Workspaces: If you use your garage as a hobby area or gym, you’ll appreciate both the quieter environment and more stable temperatures.
  • Better Protection for Belongings: Insulated doors reduce heat and cold swings that can damage tools, electronics, or even your car battery.
  • Stronger, Longer-Lasting Doors: Insulation reinforces the panels, making them more resistant to dents and daily wear.

This combination of features shows why many homeowners choose to upgrade even when noise reduction is their main goal.

Should You Upgrade or Retrofit?

If your garage door is still in good condition, retrofit insulation kits can add some noise control at a lower cost. 

However, they rarely match the performance of factory-insulated doors. Retrofitted panels may loosen over time, reducing their effectiveness.

For the best and longest-lasting results, upgrading to a professionally installed insulated door is the way to go. Modern models are engineered specifically to address noise, energy use, and durability.

Takeaway

So, how garage door insulation affects noise reduction comes down to its ability to block vibrations, absorb sound, and create a calmer environment. 

By adding insulation, you not only reduce the hollow banging of the door but also cut down on outside noise. 

Pair it with a modern opener and well-maintained hardware, and your garage becomes noticeably quieter and more comfortable.

If you live in Niles, IL or nearby, Peter and Sons Constructions can help you choose and install the right insulated garage door for your home. 

The result: a garage that’s stronger, quieter, and better suited to your lifestyle.

How Garage Door Insulation Helps Keep Heat Out of Your Home

When summer temperatures rise, your garage can quickly turn into one of the hottest spaces in the house. 

Since most garages aren’t built with the same insulation as the rest of your home, they often trap heat, making them uncomfortable and even harmful for items stored inside. 

Homeowners often ask: does garage door insulation keep heat out?

The answer is yes, but the results depend on the type of insulation you choose, the condition of your garage door, and the overall setup of your garage. 

Let’s look at how insulation works, the options available, and what you can expect when upgrading your garage door.

How Does Garage Door Insulation Keep Heat Out?

Garage doors are large, thin surfaces that act as conductors of outdoor temperatures. 

When the sun beats down in summer, the metal or wood panels heat up and transfer that heat inside. 

Insulation works as a barrier, slowing the transfer of hot air into the garage. The better the insulation, the more effectively it keeps the garage cooler.

The answer to does garage door insulation keep heat out also depends on the surrounding structure. 

If your garage walls and ceiling are insulated, adding garage door insulation makes a noticeable difference. 

Without it, your garage can reach temperatures 20 to 30 degrees hotter than the outside air.

What Types of Garage Door Insulation Work Best?

There are a few configurations you can choose from depending on your budget and needs:

  • Polystyrene Panels: Lightweight foam sheets inserted into garage door sections. Affordable and easy to install, but offer moderate thermal resistance.
  • Polyurethane Foam: Sprayed or injected into the door sections, creating a denser and stronger barrier. This option provides better insulation and also strengthens the door against dents.
  • Reflective Foil Insulation: Uses aluminum foil layers to reflect radiant heat away from the garage. Works well in hot climates but less effective in colder seasons.

Each type comes with an R-value (a measure of insulation performance). Higher R-values mean better insulation and improved comfort. 

For example, a standard non-insulated steel door may have an R-value of 1, while a high-quality insulated door with polyurethane foam can reach an R-value of 12 or higher. 

That difference can reduce garage heat by 15 to 20 degrees on a summer day.

Does Garage Door Insulation Keep Heat Out During Summer Only?

Many homeowners think insulation is only for cold winters, but it’s equally useful in summer. Just as it prevents warm air from escaping in winter, insulation also keeps hot outdoor air from entering in summer. 

This helps keep the garage closer to indoor temperature levels, reducing stress on air conditioning if the garage is attached to the house.

So, when asking does garage door insulation keep heat out, the answer applies year-round: it helps regulate temperature in both directions.

Can Insulated Garage Doors Lower Energy Costs?

Yes. A hot garage transfers heat into adjacent rooms, making your air conditioner work harder. An insulated garage door reduces that heat transfer. 

If you use your garage as a workshop, home gym, or laundry area, insulation keeps the space more comfortable without running fans or portable AC units.

For attached garages, the benefits extend to the rest of your home. Less heat seeping through the walls means lower cooling bills and a more consistent indoor environment. 

Over time, the energy savings often balance out the cost of upgrading to an insulated garage door.

Another overlooked benefit is noise reduction. Insulated garage doors naturally absorb sound, which can be helpful if your garage faces a busy street or you frequently use power tools inside. 

This makes insulation a smart choice for comfort in more ways than one.

What’s the Best Option for Your Home?

Choosing the right insulation depends on how you use your garage:

  • For homeowners using the garage as a living or working space, polyurethane foam provides the most effective insulation and soundproofing.
  • For storage garages, polystyrene panels may be enough to protect items from extreme heat.
  • For areas with long, hot summers, reflective foil insulation can add extra protection against radiant heat.

If you’re unsure, a professional installer can recommend the right configuration based on your garage door type, climate, and budget.

Should You Replace or Retrofit?

If your garage door is old, warped, or damaged, adding insulation may not be enough. In these cases, replacing the door with a pre-insulated model provides the best results. 

Modern insulated garage doors are built with materials that maximize energy efficiency while improving durability and appearance.

If your door is in good shape, retrofit insulation kits are an affordable way to improve comfort without replacing the entire door. 

Keep in mind that professional installation usually provides tighter seals and better long-term performance than DIY kits.

Why Garage Door Insulation Matters More Than You Think

So, does garage door insulation keep heat out? Absolutely. 

While results vary based on the insulation material and the overall condition of your garage, the right setup can lower indoor temperatures, protect your belongings, and even cut energy costs.

If you spend time in your garage—or simply want to stop it from becoming the hottest part of your home—insulation is one of the smartest upgrades you can make. 

A cooler garage protects everything inside, from power tools and electronics to your car’s battery and tires, which can wear faster in extreme heat. 

Plus, when combined with a quality seal around the door and proper wall insulation, the benefits extend throughout your home.

For homeowners in Niles, IL and nearby communities, Peter and Sons Constructions offers professional garage door installation and insulation services tailored to your needs. 

With the right garage door configuration, you can enjoy a more comfortable home, improved energy efficiency, and peace of mind knowing your investment is working year-round.

How to Open Garage Door Without Power

Power outages can be frustrating, especially when your garage door won’t open and you need to get in or out. 

Since most garage doors are powered by an electric opener, the system stops working when electricity is cut off. 

That’s when many homeowners ask how to open a garage door without power. 

The good news is that modern garage doors are designed with a manual release system, so you can operate them safely during an outage. 

Knowing how to do this—and what steps to take afterward—ensures you aren’t left stranded or dealing with unnecessary damage.

Why You Might Need to Open a Garage Door Without Power

The most obvious reason is a power outage. But there are other situations where learning how to open a garage door without power comes in handy. 

Sometimes, the opener itself may fail due to a tripped circuit breaker, a blown fuse, or internal motor issues. 

In other cases, a power surge can disable the system. No matter the cause, being prepared allows you to handle the situation calmly and keep your garage accessible.

How to Open a Garage Door Without Power: Step-by-Step

Most modern garage doors include an emergency release feature that lets you disconnect the door from the opener. This makes it possible to lift and lower the door manually. Here’s the general process:

  1. Make Sure the Door Is Fully Closed
    If the door is stuck halfway open when power goes out, don’t try to release it yet. Secure it first with clamps on the tracks to prevent it from slamming down.
  2. Locate the Emergency Release Cord
    Look for a red cord hanging from the opener rail. This is the manual release handle.
  3. Pull the Cord Firmly
    Tugging the cord disengages the opener’s trolley from the door. You may hear a click as the mechanism unlocks.
  4. Lift the Door Manually
    With the opener disconnected, grab the handle near the bottom of the door and lift it smoothly. Most doors are counterbalanced by springs, so the weight should feel manage
  5. Close the Door Carefully
    When you’re done, lower the door gently to avoid slamming it and damaging the panels or tracks.

This simple sequence is the foundation of how to open a garage door without power. But it’s important to handle the door with care and check that the springs and cables are intact before attempting.

Safety Precautions to Keep in Mind

Manually lifting a garage door can be risky if parts of the system are already worn. For example, if a spring is broken, the door will feel extremely heavy and may be unsafe to lift.

If you notice frayed cables, loud popping sounds, or unusual resistance, stop immediately. Forcing the door open in these conditions can cause injury or damage.

 Always keep a firm grip on the handle, and don’t let children attempt to open the door during an outage. Safety should come before convenience every time.

What to Do After Opening the Door

Knowing how to open a garage door without power is only half the solution. Once the door is open, think about the next steps. If the outage is temporary, you can continue to use the door manually until power returns. 

But if the opener itself is faulty, you’ll need to reset or repair it. 

After electricity is restored, you’ll have to reconnect the opener by pulling the emergency cord toward the opener motor until the trolley snaps back into place. 

Then, run the opener once to fully engage the system.

If your garage is a main entry point, consider keeping a spare house key accessible during outages. That way, you won’t be locked out when the opener isn’t functioning.

Preventing Problems During Future Outages

While you can’t prevent every power outage, you can prepare your garage to handle them better. Regular maintenance of the springs, cables, and rollers ensures the door is safe to operate manually when needed. 

Adding a backup battery to your garage door opener is another smart step. Many newer openers come with built-in battery backup, which allows you to open and close the door automatically even during an outage. 

If security is a concern, make sure your manual release system has a lock to prevent unauthorized access while the power is out.

When to Call a Professional

If you find the door too heavy to lift, the springs may be worn or broken. In that case, it’s not safe to keep forcing the door open manually. Call a garage door professional who can inspect and repair the system.

 Similarly, if the cable slips, the tracks are bent, or the opener doesn’t reconnect after power is restored, professional service is the safest and most effective solution.

Stay Prepared, Stay Safe

Learning how to open a garage door without power gives you confidence during outages and equipment failures. The emergency release system is designed for convenience, but it works best when paired with safety awareness and regular maintenance. 

If the door feels unsafe or refuses to move, don’t risk injury by forcing it. Instead, rely on professional help to restore your garage door to working order.

For homeowners in Niles, IL and the surrounding areas, Peter and Sons Constructions provides expert garage door repair, opener service, and emergency assistance. 

With the right preparation and support, you’ll never be caught off guard by a power outage again.

How to Install Reflective Insulation on a Garage Door

If your garage feels like an oven during the summer, you’re not alone. Because garage doors are large, thin surfaces, they soak up the sun’s heat and transfer it indoors, making the space uncomfortable. 

One effective solution is reflective insulation, a material designed to bounce radiant heat away instead of absorbing it. 

Many homeowners want to know how to install reflective insulation on a garage door to make their garages cooler, more energy-efficient, and better protected. 

The process is manageable with the right tools and preparation, but it’s also important to understand why reflective insulation works and how to avoid common mistakes.

Why Reflective Insulation Works

Unlike traditional foam or fiberglass insulation, reflective insulation uses aluminum foil surfaces to reflect radiant heat. 

This means instead of trying to slow down heat transfer, it actively pushes it away. In a garage where the door faces direct sunlight, this can lower indoor temperatures significantly. 

Reflective insulation also adds a lightweight barrier that doesn’t strain the garage door opener or add much bulk to the panels. 

For homeowners curious about how to install reflective insulation on a garage door, the main attraction is comfort; the garage becomes cooler in summer and more consistent in temperature year-round.

Tools and Materials You’ll Need

Before getting started, gather the tools and supplies required for a smooth installation. Having the right items ensures accuracy and prevents mid-project interruptions. Commonly used tools include:

  • Reflective insulation rolls or pre-cut panels
  • Measuring tape for accurate panel sizing
  • Utility knife or heavy-duty scissors for clean cuts
  • Double-sided tape or adhesive strips
  • Straightedge for guiding cuts
  • Safety gear, including gloves and protective glasses

Some kits come with pre-measured panels that fit directly into garage door sections, which can save time. Preparing everything ahead of time allows you to focus fully on the installation itself.

How to Install Reflective Insulation on Garage Door: Step-by-Step

The process is straightforward, but accuracy matters for the best results. Start by cleaning the inside surface of your garage door. 

Dust and grease can prevent the adhesive from sticking properly. 

Next, measure each panel of the garage door and cut reflective insulation panels to size, leaving a slight overlap for better coverage. 

Apply double-sided tape or adhesive strips along the panel edges, then press the insulation firmly into place, reflective side facing outward. 

Work panel by panel until the entire door is covered. Finally, check that no gaps are left uncovered, as even small openings can let heat through and reduce effectiveness.

For pre-cut kits, the process is even simpler. The insulation pieces are designed to fit snugly into the panel recesses without adhesive. 

You’ll just need to press them into place and make sure they’re secure. Either way, the goal is to create a continuous reflective barrier across the entire door.

Safety Precautions to Keep in Mind

When learning how to install reflective insulation on a garage door, safety should always be part of the plan. Make sure the garage door is closed and locked in place before starting to prevent movement. 

If using a ladder, place it on stable ground and avoid leaning too far. Be cautious when cutting foil-backed insulation; it can be sharp along the edges. 

Also, avoid blocking or interfering with the garage door’s moving parts, like hinges, rollers, or tracks. An incorrect installation could damage the door or affect its balance.

Benefits Beyond Cooling

Reflective insulation isn’t just about beating the heat. It offers additional advantages that improve comfort and protect your garage year-round:

  • Temperature Control in Winter: While not as effective as foam insulation in cold climates, reflective insulation still reduces drafts and helps stabilize indoor temperatures.
  • Energy Savings: By lowering the amount of heat transfer, it reduces the load on your home’s HVAC system, especially if the garage is attached to living spaces.
  • Durability: The material resists moisture, mold, and pests, making it a long-lasting solution.
  • Lightweight Design: It adds very little weight to the door, so it won’t strain your opener or springs.
  • Improved Comfort: A garage that’s cooler in summer and less drafty in winter becomes more usable for storage, hobbies, or workouts.

These benefits highlight why reflective insulation is a popular choice for homeowners looking for both comfort and cost savings.

When to Call a Professional

While installing reflective insulation is manageable for many homeowners, not every situation is DIY-friendly. 

If your garage door is older, damaged, or already unbalanced, adding insulation could worsen the problem. In those cases, it’s better to have a professional inspect the door before installation. 

A technician can recommend the right type of insulation, ensure the door’s hardware is in good shape, and even install the insulation for you if needed. 

This guarantees the project is done safely and effectively.

Stay Cooler with Reflective Insulation

Learning how to install reflective insulation on a garage door is a practical way to improve comfort in your garage, especially during hot summers. 

By reflecting radiant heat, this type of insulation helps keep the garage cooler, reduces strain on your cooling system, and adds long-term durability. 

With the right tools and careful installation, you can tackle the project yourself, or rely on professionals for a guaranteed fit.

If you’re in Niles, IL or the surrounding areas, Peter and Sons Constructions can help with garage door insulation, repairs, and upgrades. 

Our team ensures your garage door performs its best while keeping your space comfortable year-round.

How to Reconnect Garage Door Cable and Prevent Future Problems

how to reconnect garage door cable

When your garage door stops working properly, one of the most common culprits is a loose or detached cable. 

The cables are critical for keeping the door balanced, working alongside the springs to handle the heavy lifting. 

If one slips out of place, the door may jam, tilt to one side, or refuse to open altogether. 

Many homeowners want to know how to reconnect a garage door cable safely without making the issue worse. 

The good news is that reconnecting a cable is sometimes possible on your own, but it must be done carefully. Even more important, you’ll want to take steps to prevent the problem from happening again.

Why Garage Door Cables Come Loose

Garage door cables can disconnect for a few reasons. In some cases, the cable simply slips off the drum when tension isn’t distributed evenly. 

This might happen after a power outage, when the opener is disengaged and the door is moved manually. 

Other times, worn parts like frayed cables, bent tracks, or failing springs can cause slack in the system, letting the cable slip. 

If the cable came loose suddenly while the door was operating, it’s often a sign of a deeper mechanical problem that needs more than a quick reconnection. 

Understanding the cause is the first step before learning how to reconnect a garage door cable.

How to Reconnect Garage Door Cable Safely

The process of reconnecting a garage door cable varies depending on whether your door uses torsion springs or extension springs, but the general approach is similar. 

First, disconnect the opener to make sure the door doesn’t move unexpectedly. Secure the door in place with clamps or locking pliers on the tracks so it can’t drop while you’re working. 

For torsion spring systems, the cable usually needs to be re-threaded onto the drum at the top of the door. Make sure it’s seated correctly in the grooves before winding tension back into the spring with winding bars. 

For extension spring systems, the cable may need to be repositioned over pulleys and reconnected to the bottom bracket. 

After reattaching, check that the cable is taut and that the door moves evenly. 

Test it by carefully lifting the door halfway—if it stays in place, the tension is correct. This outline gives you an idea of how to reconnect a garage door cable, but remember, these systems are under extreme tension and require careful handling.

Why Safety Should Be Your First Priority

Even though reconnecting a cable may sound straightforward, the reality is that cables and springs are among the most dangerous parts of a garage door system. 

They store an enormous amount of energy, and releasing it suddenly can cause serious injury.

 A cable that’s reconnected incorrectly may snap free under pressure or cause the door to slam shut unexpectedly.

 That’s why many professionals recommend avoiding DIY fixes unless you’re experienced with garage door repairs. 

If you’re unsure at any step while figuring out how to reconnect a garage door cable, it’s safer to stop and call a technician.

When Reconnecting Isn’t Enough

Sometimes, putting the cable back in place doesn’t solve the real issue. If the cable keeps slipping, the drums or pulleys may be worn and no longer holding the cable securely. 

If the springs are weak, they may not maintain proper tension, causing the cable to go slack again. Frayed or stretched cables should be replaced altogether, since reconnecting them only delays a bigger problem. 

In some cases, the root cause is misalignment in the tracks, which creates uneven movement and forces the cable out of its groove. 

Reattaching the cable won’t fix that underlying misalignment. If you’ve had to reconnect a cable more than once in a short time, it’s usually a sign that the system needs professional inspection and repair.

Preventing Future Cable Problems

Once you’ve learned how to reconnect a garage door cable, the next step is prevention. Regular maintenance makes a huge difference in keeping cables secure. Inspect the cables twice a year for fraying, slack, or uneven wear. 

Keep the tracks free of debris and ensure pulleys or drums are clean and in good condition. Lubricating moving parts with the right garage door lubricant also reduces strain that can cause cables to loosen. 

Finally, schedule professional tune-ups once a year to check spring tension and alignment. These small efforts reduce the risk of cables slipping off and help your door run smoothly.

Why Call a Professional Instead

For many homeowners, the best way to deal with a loose cable is to call a professional right away. 

A technician has the tools and knowledge to reconnect or replace the cable safely, while also checking for hidden issues that caused the problem in the first place. 

They can adjust the springs, replace worn drums or pulleys, and balance the door properly. 

This not only solves the immediate problem but also prevents future headaches. 

While learning how to reconnect a garage door cable is useful, trusting the repair to a pro ensures your door operates safely for years to come.

A Secure Cable Means a Safer Door

Knowing how to reconnect a garage door cable gives you a better understanding of how your garage door works and what to do when problems come up. 

While reconnecting the cable is sometimes possible on your own, safety should always come first. 

If the cable slipped because of worn springs, stretched cables, or damaged hardware, reconnecting alone won’t solve the issue. 

Preventive maintenance and professional service are the best ways to keep your garage door operating reliably.

If you’re in Niles, IL or nearby, Peter and Sons Constructions provides expert garage door cable repair, replacement, and maintenance. 

With our help, you’ll have peace of mind knowing your door is safe, balanced, and ready to use every day.

How to Adjust Garage Door Cable Tension

A well-functioning garage door should open and close smoothly. But if your door looks uneven, gets stuck halfway, or slams shut too quickly, the problem may be cable tension. 

Homeowners often want to know how to adjust garage door cable tension safely and correctly, since the cables are critical for balancing the heavy weight of the door. 

Adjusting them can improve performance, but it’s also a job that requires care and the right setup.

Why Cable Tension Matters

Garage door cables work with the springs to lift and lower the door evenly. When the tension isn’t correct, one side may move faster than the other, leaving the door crooked or unbalanced. 

This imbalance stresses the opener, tracks, and rollers, leading to more expensive repairs if ignored. 

The good news is that learning how to adjust garage door cable tension helps prevent these issues and keeps your door running safely. 

But since cables and springs are under high pressure, it’s important to understand the configurations and safety measures before making adjustments.

Signs Your Garage Door Cable Tension Is Off

It’s not always obvious when tension is the issue. Some of the most common signs include:

  • The door looks crooked when halfway open.
  • The door moves unevenly or jerks during operation.
  • The door doesn’t stay in place when partially open.
  • The cable looks slack or loose on one side when the door is open.
  • The opener strains or makes unusual noises when lifting the door.

If you notice any of these symptoms, it’s likely time to adjust cable tension.

Configurations of Garage Door Systems

Not all garage doors use the same setup, and the way you adjust the cable tension depends on the system your door has. 

Torsion spring systems, which are located above the door, rely on springs wound around a shaft with cables attached to drums at each end. 

Adjusting cable tension in this setup typically involves winding or unwinding the torsion springs. Extension spring systems, found on either side of the door, stretch and contract as the door moves. 

In this setup, the cables run over pulleys, and adjustments may involve repositioning the S-hook or pulley system. 

Some doors with extension springs also use safety cables, which prevent springs from flying off if they break. 

These setups require careful handling of both the main cable and the safety cable. Understanding which configuration you have is the first step in figuring out how to adjust garage door cable tension properly.

How to Adjust Garage Door Cable Tension

Although details vary by configuration, the process generally follows a sequence. First, disconnect the opener to prevent accidental activation. Then, secure the door in place with clamps or locking pliers on the tracks.

For torsion spring systems, winding bars are used to carefully relieve spring tension before adjusting the cables, while extension systems usually require opening the door fully to reduce tension. Once it’s safe, reposition the cable on the drum or pulley system and adjust the spring tension evenly. 

After adjustments, test the balance by opening the door halfway and letting go carefully. A balanced door should stay in place without rising or falling. When you’re satisfied, reconnect the opener and run a full cycle to confirm smooth operation.

Why Safety Comes First

Adjusting garage door cable tension isn’t like tightening a loose screw. The cables and springs hold hundreds of pounds of pressure, and one wrong move can cause serious injury. Professionals use specific tools like winding bars and clamps that are designed for this type of work. 

Using makeshift tools such as screwdrivers or pliers increases the risk of slipping. If you’re not completely confident, it’s always safer to let a trained technician handle the adjustment.

When Adjustment Isn’t Enough

Sometimes, tension problems point to bigger issues in the system. 

If you find yourself constantly needing to adjust the cables, the real culprit may be worn springs that no longer hold proper tension, damaged drums or pulleys causing the cables to slip, frayed or stretched cables, or even bent tracks that interfere with movement. 

In these cases, adjusting cable tension only provides a temporary fix, and a full inspection and repair may be necessary.

Maintenance Tips to Keep Cables in Check

To avoid repeated tension issues, a few simple maintenance steps can go a long way:

  • Inspect cables twice a year for fraying or slack.
  • Keep tracks and pulleys free of debris.
  • Lubricate moving parts with garage door lubricant, not household oil.
  • Schedule annual professional tune-ups to check balance and tension.

These small efforts help extend the life of your cables and springs while reducing the risk of sudden breakdowns.

A Balanced Door Is a Safe Door

Learning how to adjust garage door cable tension gives you insight into one of the most important parts of your garage door system. Correct tension keeps the door balanced, prevents uneven wear, and reduces stress on the opener. 

While some minor adjustments are possible for handy homeowners, dealing with high-tension springs always carries risks. If your door continues to show signs of imbalance or slack cables, the safest move is to call a professional. 

For homeowners in Niles, IL and surrounding areas, Peter and Sons Constructions provides expert cable adjustments, replacements, and full garage door maintenance services.

A properly balanced garage door doesn’t just move more smoothly; it also keeps your family and property safe.