How to Find a Garage Door Repair Near Me That Gets the Job Done

Garage Door Repair

Garage Door

Garage Door Repair

When your garage door stops working or sounds off, the first instinct is to look for someone nearby who can fix it. 

Searching for garage door repair near me usually brings up dozens of options, but how do you know which ones are worth your time and money? The answer comes down to quality, speed, safety, and local reliability.

Garage doors are heavy, moving systems. A worn cable, broken spring, or misaligned track can stop the whole door from working or create a safety hazard. Local repair professionals understand common issues in your area and usually respond faster than national chains or faraway contractors.

What Leads to Garage Door Problems in the First Place

A garage door goes through a lot daily; opening and closing multiple times, exposed to the weather, and constantly under tension. 

Over time, the wear adds up. Some of the most common problems homeowners report include sticking doors, loud noises during movement, uneven lifting, or total failure to open or close.

In many cases, these issues trace back to broken or stretched springs, worn rollers, bent tracks, or malfunctioning openers. These aren’t just minor annoyances. Left unchecked, they can damage your door system and lead to expensive replacements.

Why Hiring Local Still Matters

When you search, you’re tapping into a pool of nearby businesses that know your local building codes, weather challenges, and service needs. 

Local repair techs often have a better understanding of how winter affects garage systems, how older home models are built, and how to meet city permit requirements.

Working with someone close by also means quicker response times. You won’t be waiting days for help or trying to explain your problem over long-distance support lines. Instead, you get real-time scheduling and service, often from someone who’s worked on homes just like yours.

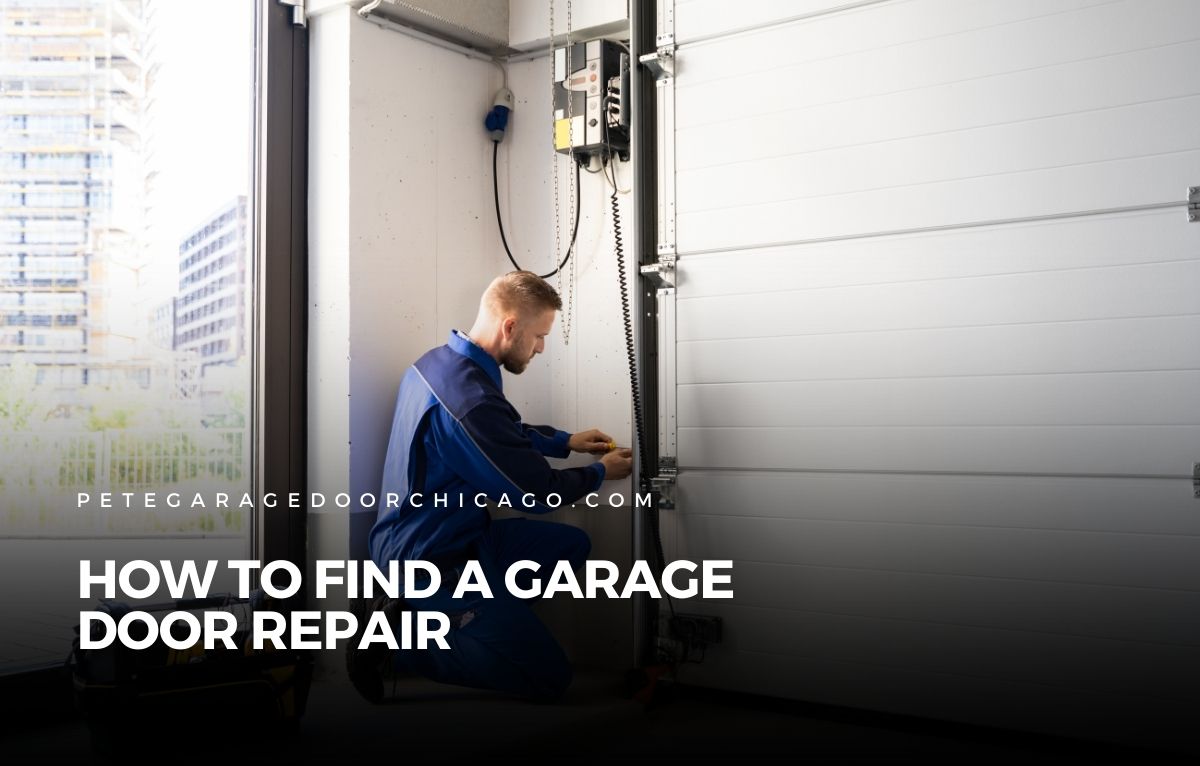
What to Expect from a Professional Garage Door Repair

Not all garage door companies follow the same process. Some are thorough and transparent. Others rush through the job and leave you guessing. A reliable company takes a full-system approach and checks for root issues, not just the surface-level problem.

Here’s what a quality repair process usually includes:

  1. Inspection of all key parts: springs, tracks, rollers, cables, and opener
  2. Cleaning and lubrication of moving components
  3. Replacement of any broken or damaged parts
  4. Testing the balance, alignment, and responsiveness of the system

This kind of full inspection ensures the garage door works smoothly, reduces wear over time, and lowers the chance of needing another repair soon after.

What to Ask Before You Hire Someone

Not all “garage door repair near me” results will lead to dependable service. To avoid hiring someone unqualified or overpriced, ask a few clear questions before moving forward.

Ask how long they’ve worked in your area. See if they handle your specific problem. Request a simple quote before they show up. 

If you’re unsure, check for reviews on Google, Yelp, or Better Business Bureau listings. Real customer feedback often tells you more than a company’s website.

Also, be sure to ask about parts and warranty coverage. A strong company won’t avoid these topics; they’ll explain exactly what you’re paying for and how long the repair should last.

DIY or Call a Pro? When It’s Worth Bringing in Help

It can be tempting to fix a noisy or slow garage door yourself, especially if you’ve tackled small home repairs before. But not all issues are safe to handle without training.

Replacing a battery or cleaning dirt from tracks is low risk. But adjusting or replacing high-tension parts like torsion springs or lift cables can be dangerous. These parts hold a huge amount of energy and require the right tools to fix safely.

As a rule, leave these to professionals:

  • Spring replacement or tension adjustment
  • Cable repairs
  • Track realignment
  • Motor or circuit board issues

If the problem involves anything under tension or affecting the door’s balance, calling a pro is safer and usually faster.

Local Search Helps You Find Faster, Safer Solutions

Typing “garage door repair near me” into your phone or computer isn’t just about convenience. It’s about finding people in your neighborhood who are familiar with your area’s needs, faster to respond, and easier to hold accountable.

Most homeowners want the job done right the first time. That comes from hiring someone who knows local codes, understands your door model, and has real experience in your area.

Reliable Repair Starts with the Right Search

A working garage door makes life easier, keeps your property secure, and protects your car from the elements. When something goes wrong, a quick online search for garage door repair near me can be helpful, but only if you know what to look for in a local company.

Look for clear communication, a good reputation, and a process that puts safety first. A dependable garage door technician doesn’t just swap out parts. They restore the whole system and help it last longer.

Peter and Sons Construction offers trusted garage door repair to homeowners across Niles, IL. We respond quickly, use quality parts, and make sure your garage door works the way it should: safe, smooth, and reliable.

You might like these

Why Custom Garage Builders in Chicago Are a Smart Choice

Garage Door

When you’re ready to build a garage, going custom might feel like a big leap, but in a city like Chicago, it often makes the most sense. 

Working with custom garage builders in Chicago gives you the flexibility to design a structure that fits your home, lot size, lifestyle, and long-term plans.

A garage isn’t just a place to park your car. It’s storage, a workspace, weather protection, and an investment in your property. 

Custom garage builders understand the local building codes, weather conditions, and neighborhood styles. That’s a big advantage when you want the garage to look right and last decades.

What Makes a Garage Truly Custom

A custom garage doesn’t mean over-the-top. It simply means the design is tailored to your specific needs, not pulled from a one-size-fits-all catalog. 

Instead of forcing your property or routines to fit around a pre-made garage, custom builders make the garage fit you.

This might include changing the layout, materials, roofline, or adding features like storage lofts, insulated walls, or multiple access points. Many homeowners in Chicago need garages that work year-round, which means adding durable siding, roof drainage suited for snow, or even heated interiors.

With custom garage builders in Chicago, you don’t have to compromise on the essentials just to get something fast. You get a garage that serves its purpose without cutting corners.

Why Homeowners in Chicago Choose Custom Over Prefab

Prefab garages have a lower starting price, but they come with serious trade-offs. The design is limited. Materials are often cheaper. And if your lot size is unusual or you live in a neighborhood with strict guidelines, prefab usually won’t cut it.

Custom-built garages, on the other hand, can work around zoning rules, design preferences, and space limitations. In Chicago, where weather can be rough and homes vary from block to block, having a builder who can adapt the garage to the property gives you more value and fewer headaches.

Key Benefits of Hiring Custom Garage Builders in Chicago

Custom garage builders offer more than construction — they offer problem-solving and local expertise. Here’s what sets them apart:

  1. Design that matches your home
    They can match rooflines, siding, windows, and trim to make the garage look like it belongs with your house.
  2. Flexible layouts for storage and access
    Instead of a basic box, you can include extra depth, lofted storage, or side-entry access.
  3. Stronger materials for local weather
    Chicago winters are tough. Custom builders can install stronger framing, reinforced doors, and proper roof drainage.
  4. Room for future upgrades
    Want to add electric vehicle charging, insulation, or heating later? Custom builds are easier to upgrade when planned right.

What to Look for in a Custom Garage Builder

Not every builder offers the same level of service or experience. Choosing the right team can save you time, money, and stress during the project.

Before signing a contract, look for:

  • A track record of completed projects in the Chicago area
  • Familiarity with local permit and zoning requirements
  • Clear communication about budgets, timelines, and materials
  • Willingness to explain design options, pros, and trade-offs
  • Reviews or references from past clients

Make sure the builder walks the property, answers questions clearly, and gives you a plan that fits both your budget and your goals. A good builder won’t rush the planning phase, they know the long-term success of the garage depends on solid groundwork.

Typical Process with a Custom Garage Builder

Working with custom garage builders in Chicago follows a practical step-by-step flow that keeps the project organized. Here’s what you can expect:

  1. Site visit and planning
    The builder assesses your space, layout needs, and how the garage will connect to your home or alley.
  2. Design and estimate
    They prepare sketches, finalize materials, and walk through cost breakdowns.
  3. Permitting and prep
    Zoning, permits, and any required city approvals are handled.
  4. Construction and inspection
    From foundation to final paint, each step follows local codes and is inspected for safety and quality.

This timeline may vary depending on the weather, scope, and neighborhood rules, but a good builder keeps you informed at every step.

Custom Garage Use Cases Beyond Parking

Garages do more than hold cars. Many homeowners build them with added purposes in mind. When you go custom, you’re not stuck with a simple shell. Your builder can design the garage for:

  • Workshop space
  • Extra household storage
  • Backyard studio or home office
  • Heated winter vehicle storage
  • Bike and gear room

These extra uses often raise the return on investment. A well-planned garage doesn’t just add space, it adds function that makes everyday life easier.

Make the Right Call for Long-Term Value

A custom garage may cost more upfront, but it can pay off in comfort, usability, and resale value. Think about the years you’ll use the space, pulling into a structure that fits your life, protects your property, and adds to the look of your home.

Prefab garages are limited by their templates. Custom builders work with your ideas, your property’s shape, and your local environment. 

When it’s done right, a custom garage can look like it was always part of the home. That level of fit and finish often translates to better value and fewer regrets.

Build It Once, Build It Right

You don’t need a luxury design to benefit from working with custom garage builders in Chicago. You just need a builder who listens, knows the area, and builds garages that work for real homes and real weather.

With a solid team, you get more than a place to park. You get a space that makes your day easier, your home look better, and your property worth more.

If you’re ready to get started, Peter and Sons Construction builds custom garages designed for Chicago weather, zoning, and daily life. We work with homeowners to create garages that work now and hold up for years to come.

You might like these

Garage Door Not Holding Heat? Try This Foam Board Insulation Fix

Garage Door

Your garage might look sealed, but if the door panels are bare metal, you’re still losing heat by the hour. Foam board insulation solves that. It’s rigid, lightweight, and made to slow down temperature loss in spaces like garages that face extreme swings in weather.

This guide walks you through how to install foam board insulation on your garage door—clean, tight, and built to last.

Why Foam Board Insulation Works for Garage Doors

Garage doors may look solid, but they’re one of the weakest links in maintaining a stable indoor temperature. That’s especially true if your garage is attached to your home or doubles as a workspace. Most standard garage doors are built with little to no insulation. As a result, outside air seeps in, indoor heat escapes, and your energy bills slowly creep up—especially during summer and winter.

Foam board insulation is one of the most effective and affordable ways to solve this. Unlike blanket insulation or loose-fill materials, foam board panels offer high insulating power with minimal bulk. They’re rigid, moisture-resistant, and easy to cut to size, making them ideal for garage door retrofits. Once installed, they help regulate interior temperature, reduce noise, and even add a bit of structural support to older panels.

Before You Begin: What You’ll Need

Prepping correctly is key. Don’t rush into cutting and sticking panels until you’ve made sure the surfaces are clean and the materials are the right type.

Required Materials:

  • Rigid foam board insulation (usually polyisocyanurate or polystyrene)
  • Measuring tape
  • Straightedge or T-square
  • Utility knife or insulation cutter
  • Double-sided construction tape or adhesive glue
  • Degreaser or all-purpose cleaner
  • Rag or microfiber towel

Optional but helpful:

  • Aluminum foil tape (to seal panel edges)
  • Insulation retaining clips
  • Gloves and protective eyewear

You can purchase foam board insulation panels pre-cut for garage doors, or buy larger sheets and cut them down yourself. If going the DIY route, opt for 1-inch thick panels for a good balance between R-value and ease of installation. Most garage doors have recessed panels that are perfect for holding these snugly without interfering with door movement.

Step-by-Step: How to Install Foam Board Insulation on a Garage Door

Start by opening your garage door fully and locking it in place. This gives you better access to each section without worrying about the door shifting.

  1. Measure the Panels Carefully

Each panel of your garage door likely has a recessed area. That’s where the foam boards will go. Measure the width and height of each inset individually—don’t assume they’re all identical, especially on older doors.

When you’re dealing with foam board, precise cuts matter. A poorly cut panel may bulge out, reduce the seal, or come loose over time. Always measure twice before trimming, and label each cut panel if you’re doing them in batches.

  1. Prep the Surface

Use a degreaser or mild soap solution to clean each door panel. Any dust, grease, or residue can weaken the bond between the foam board and the door. Dry thoroughly using a lint-free cloth. This step is often rushed, but skipping it almost always leads to panels falling off later.

  1. Cut and Test-Fit Each Panel

Lay your foam board on a clean surface. Using a straightedge and a utility knife, cut each piece to match your measurements. A snug fit is ideal; tight enough to stay in place without bowing the panel or sticking out.

Before applying any adhesive, dry-fit the insulation into the door panel. This test run helps catch errors before they become permanent.

  1. Apply Adhesive and Press Firmly

If using double-sided construction tape, apply strips around the back edges of the foam panel. For adhesive glue, apply thin, even beads in a grid or zigzag pattern. Either way, press the panel into the door recess and hold it for 30–60 seconds to make sure it sets.

Work from the top down to maintain balance. Starting at the bottom could add stress to the lower sections as you go.

  1. (Optional) Seal Edges with Foil Tape

If you live in a region with extreme temperature swings, aluminum foil tape adds extra protection. It seals any air gaps, prevents moisture intrusion, and keeps the edges clean. It’s especially useful for older garage doors or uneven surfaces.

What Comes Next: Benefits After Installation

If installed correctly, you’ll feel the difference fast. Winter air won’t sneak in through the metal, and summer heat won’t cling to the panels. Expect the internal temperature to stay more stable, especially overnight or during heatwaves.

Beyond temperature control, insulation also reduces outside noise. If your garage faces a busy street or noisy neighbors, foam board panels help mute the racket. It also improves door performance—less vibration, fewer rattles, and a quieter motor cycle.

Some homeowners even report a modest improvement in their energy bills. If your garage is attached to a climate-controlled part of your home, insulating the door helps retain that heating or cooling.

Mistakes That Make Panels Fall Off

While foam board insulation offers clear benefits, even small mistakes during installation can undo your hard work. Many homeowners underestimate how precise the process needs to be. If your panels keep falling off, chances are one of these common issues is to blame:

Dirty surfaces: Oil, dust, or humidity can prevent adhesives from sticking.

Wrong tape or glue: Basic double-sided tape isn’t strong enough. Use adhesives rated for foam and temperature fluctuations.

Panels too tight or too loose: Tight panels may bend or pop out. Loose panels shift around and lose their seal.

Skipping the test fit: Even small misalignments lead to poor insulation and aesthetic issues.

It’s also worth checking how your garage door operates after installation. While foam board doesn’t add much weight, it can affect balance if your door opener is already working hard. If the door strains or hesitates, stop and call a pro to check the spring tension.

Should You DIY or Call for Backup?

If your garage door has curved panels, inset hardware, or if you’re not comfortable working with cutting tools, it’s best to hire someone. Professionals can cut custom foam pieces and use commercial-grade adhesives that last longer.

They can also inspect the door for structural issues that insulation alone won’t fix, like cracked panels, worn weather seals, or bent tracks. In some cases, they may recommend combining foam board insulation with a full door upgrade for the best long-term results.

Wrapping Up

Foam board insulation gives your garage door a major performance boost without needing a full door replacement. It’s lightweight, effective, and relatively simple to install. With a weekend of work, you can turn a drafty garage into a more comfortable, quieter, and energy-smart space.

If you want that done right—with no cutting errors, mess, or trial-and-error—Peter and Sons can help. Our team handles garage door insulation from prep to finish, ensuring every panel fits clean and holds strong for years.

You might like these

How to Attach Garage Door Insulation Panels (So They Actually Stay Put)

Garage Door

Garage door insulation kits often advertise quick installs—“Just stick and go!” But if you want the panels to actually stay put through winter cold, summer humidity, and daily movement, it’s worth slowing down and doing it right. Attaching insulation panels isn’t just about taping them on. It’s about proper prep, secure contact, and alignment that doesn’t mess with your door’s balance.

Here’s how to get a clean, lasting result that improves your garage’s comfort without messing up how your door works.


Why Panel Attachment Matters More Than You Think

Most garage doors are made from metal—great for durability, not so great for thermal control. Insulation panels are the fix, but if they’re installed wrong, they won’t help much. Panels that pop out, sag, or shift over time can interfere with door mechanics or let heat leak right back out. Worse, poor installation might void your insulation kit’s warranty.

That’s why solid panel attachment is key. With the right prep and placement, your insulation stays effective and low-maintenance for years.


What You’ll Need

You don’t need a contractor’s toolbox to get this right. Just a handful of basics:

  • Garage door insulation panels (foil-backed or foam)
  • Tape measure
  • Utility knife or insulation shears
  • Straightedge or level
  • Degreaser or soapy cleaner
  • Rag or towel
  • Double-sided adhesive tape or mounting clips (depending on your kit)
  • Optional: Foil tape to seal edges

Pro tip: Choose insulation designed for garage doors—not leftover house insulation. Garage kits are lighter and cut to flex slightly with the door’s movement.


Step-by-Step: How to Attach Insulation Panels Securely

  1. Measure the Recessed Panels

Most garage doors have a slightly recessed panel structure. That’s where the insulation should sit—flush, not overlapping. Measure both the height and width of each recessed section. Even small differences matter if the door has aged or warped slightly.

Avoid guessing or eyeballing. Write the measurements down as you go. If the panel gaps are inconsistent, plan to trim each insulation panel individually.

  1. Prep and Clean the Surface

This is where most shortcuts go wrong. A dusty, oily, or cold panel surface will not hold adhesive well. Clean every panel using degreaser or mild dish soap diluted with water. Rinse and dry thoroughly. If the temperature is below 50°F, consider warming the garage slightly to help the adhesive grip better.

Clean surfaces = long-term stick.

  1. Cut Panels to Fit (Don’t Jam Them)

Using a straightedge and utility knife, cut each insulation panel to your measured size. Aim for a snug fit that presses in lightly without bowing the metal. For foil-faced panels, keep the reflective side facing the direction recommended—usually outward to bounce back radiant heat.

Jamming oversized panels in will just push them out later or unbalance your door. Undersized ones leave air gaps. You want just-right.

  1. Choose the Right Mounting Method

There are two popular ways to attach insulation panels:

  • Double-sided adhesive tape: Ideal for clean metal surfaces. Apply tape around the edges of the insulation panel. Press it into the garage door slowly, starting at the top and smoothing down.
  • Adhesive clips: Some kits come with plastic retainer clips that pierce through the panel and anchor into the door. These are great for movement-heavy doors or humid environments.

Pro tip: Wear gloves when handling foil-backed foam. Some panels have fiberglass fibers or edges that can irritate your hands.

  1. Seal Around the Edges (Optional)

If there are slight air gaps between the insulation and panel edge, seal them using aluminum foil tape. This boosts the insulation’s performance and gives it a clean, professional look. Just avoid taping over any hinges or joints.

If you’re dealing with curved corners or odd shapes, cut small triangles to fill in corners and tape around them. Don’t leave open air pockets if you can help it.

  1. Check Door Balance

Insulation adds a few pounds to your door. While most modern openers can handle the extra weight, it’s smart to test the door manually. Open it halfway and let go—if it slams down or shoots up, the spring tension is off.

Uneven movement? Call a pro to adjust the spring tension safely.


What Makes Panels Fall Off

Even with high-quality insulation kits, panels can still fall off if the installation steps are rushed or skipped. One of the most common reasons is poor surface prep. Dust, grease, or moisture left on the garage door will prevent adhesive tape from sticking properly. If the surface isn’t completely clean and dry, the panels may detach within days—especially during temperature changes.

Another issue is using the wrong adhesive. Household glue or low-grade tape won’t hold up to the extreme hot-and-cold cycles garage doors face. That’s why it’s important to use tape or clips designed specifically for insulation kits. Incorrectly sized panels can also cause problems. Panels that are too tight will bow or pop out when the door moves, while panels that are too loose leave gaps that reduce effectiveness and increase the chances of falling.

Lastly, some homeowners forget to account for the garage door’s motion. A poorly balanced door or one with tight clearances can snag on panels as it opens and closes, loosening them over time. Avoid these common mistakes, and your insulation will hold up longer and work better.


Post-Installation Benefits

Once installed properly, insulation panels offer immediate benefits. The most noticeable is temperature control. In winter, your garage stays warmer for longer without constant reheating. In summer, the panels help reflect heat and reduce the greenhouse effect inside the garage. This is especially valuable if your garage connects to your living space—keeping energy costs down and indoor comfort up.

Sound insulation is another plus. The panels help muffle outside noise from traffic, neighbors, or wind. If your garage is used as a workspace, gym, or laundry area, you’ll appreciate the quieter environment. You’ll also notice a reduction in dust and drafts, since insulation helps tighten up air gaps and keeps debris from sneaking in.

Beyond comfort, this upgrade can also improve your home’s resale appeal. A well-insulated, clean-looking garage door is a subtle signal of home care and energy efficiency—something buyers tend to value.


Know When to Call for Backup

If your garage door has decorative inlays, custom paneling, or non-standard shapes, it may be worth getting help. Likewise, if your opener is old or struggles with balance, a professional can safely adjust it and install the insulation without compromising function.

At Peter and Sons, we handle every detail—from cleaning and cutting to proper mounting and spring adjustment. Whether your goal is energy savings or comfort, we make sure your garage door performs better and looks cleaner.

You might like these

Installing Insulation Panels the Right Way

Garage Door

Even after sealing the sides and top of your garage door, the temperature might still feel off. That’s often because the panels themselves are letting heat escape or absorb too much from the sun. Most garage doors are made of metal, which easily conducts heat and cold—turning the space into an icebox in winter or a heat trap in summer. To fix that, you need to insulate the door itself. Installing garage door insulation panels gives the entire surface a barrier, helping your garage stay more comfortable all year round.

Why Panel Insulation Makes a Big Impact

Garage doors are usually made from steel, aluminum, or fiberglass—all excellent conductors of heat and cold. Even when the seals are tight and the gaps are closed, those materials work against you. Heat escapes easily in winter, and in the summer, the sun’s rays heat the panels like a skillet.

That’s where insulation panels come in. They’re lightweight, cut to size, and designed to slow heat transfer. The right install can reduce your garage’s temperature swings by 10–20°F, making it more usable year-round.

What You’ll Need

Insulating a garage door doesn’t require fancy tools. Most of what you need is available at your local hardware store, or comes bundled in a quality insulation kit.

  • Garage door insulation panels (foam board or reflective foil-backed)
  • Measuring tape
  • Straightedge or level
  • Utility knife or shears
  • Double-sided tape or adhesive clips
  • Degreaser or all-purpose cleaner
  • Rag or towel

Optional:

  • Aluminum foil tape for sealing edges
  • Gloves (to avoid skin irritation from some insulation materials)


Step-by-Step: How to Install Garage Door Insulation Panels

  1. Measure the Panels

Every garage door panel has a recessed section that varies slightly in size. You don’t want insulation sticking out or bulging. Use your measuring tape to note the width and height of the inset area, not the outer frame.

Take measurements twice for accuracy, especially if the door is older and panels aren’t identical. If you’re using a pre-cut kit, double-check dimensions before trimming.

  1. Clean the Panel Surfaces

Before sticking anything on the door, clean each panel’s surface thoroughly. Dust, oil, and residue from previous weather changes can affect adhesion. Use a degreaser or a mild soapy solution. Wipe it dry with a clean towel. This step ensures that the insulation stays put for the long haul.

  1. Cut the Insulation Panels to Fit

Using a straightedge and utility knife (or shears), trim the insulation panels to match your measurements. Aim for a snug fit that slides into the recess without being forced. If you’re using foil-backed panels, make sure the reflective side is facing the direction recommended by the manufacturer—usually outward to reflect heat.

Don’t worry if your cuts aren’t laser-perfect. Small gaps can be sealed with aluminum foil tape later.

  1. Attach the Panels Securely

There are two common ways to fix insulation panels in place:

  • Double-sided tape: Apply strips around the back of the insulation panel. Press it firmly into place, starting from one edge and working across.
  • Clips (included in some kits): These attach directly to the panel and allow the insulation to flex slightly with door movement. They tend to hold up better in humid environments.

Tip: Start at the top panel and work your way down. This keeps weight distribution even as you go.

  1. Seal the Edges (Optional, But Helpful)

If there’s space between the panel and insulation, use foil tape to seal the edges. This adds a layer of air resistance and makes the install look cleaner. Be careful not to block any moving hinges or hardware with tape or insulation material.

  1. Test Door Movement and Balance

After installing all the panels, test the garage door. Open and close it manually a few times. Listen for dragging, resistance, or uneven weight. Insulation adds a bit of mass to the door, and while it’s usually minimal, older openers might struggle.

If the door feels heavier or misaligned, you may need to adjust the tension springs—best handled by a garage professional for safety.

What to Expect After Installation

Done right, insulation panels make an immediate difference. You’ll feel the temperature stabilize within a day, especially in attached garages. In winter, the space holds warmth longer. In summer, it won’t trap heat as quickly.

The added insulation also dampens sound. That means less road noise creeping in and quieter operation overall. If your garage doubles as a workspace or laundry area, that boost in comfort and quiet goes a long way.

Mistakes to Avoid

  • Skipping surface prep: Panels won’t stick to dirty or oily doors.
  • Forcing oversized panels: Bulges may interfere with opening or loosen the adhesive over time.
  • Blocking moving parts: Keep insulation away from springs, hinges, and track systems.
  • Using interior-only materials: Garage doors need materials rated for extreme temperatures and humidity shifts.

Warning Signs You Need a Garage Door Specialist

Some garage doors have irregular panels, curved designs, or pre-installed hardware that makes insulation tricky. If your panels don’t sit flush, or if you’re unsure about the door’s weight after installation, it’s safer to get help.

A garage specialist can assess insulation compatibility and make adjustments that preserve your opener’s performance. They’ll also make sure the insulation aligns with the door’s movement so nothing shifts or tears after repeated use.

Final Thoughts

Installing garage door insulation panels is one of the most cost-effective upgrades you can make. It improves comfort, saves energy, and adds durability to a space you use daily. If you’ve already sealed the edges and the temperature still fluctuates wildly, it’s time to give the panels the attention they deserve.

And if you want a clean, balanced, and efficient finish without trial and error—Peter and Sons is always ready to help.

You might like these

Tired of a Freezing or Boiling Garage? Insulate That Metal Door

Garage Door

A metal garage door without insulation turns your garage into an oven in summer and an icebox in winter. Heat transfers through the panels fast, making it tough to control temperature or protect anything stored inside. If the space feels unbearable during extreme weather or your utility bills keep climbing, the door could be the weak spot. Insulating it improves comfort, saves energy, and makes your garage usable year-round.

We’re breaking down how metal garage door insulation actually delivers results—no gimmicks, no shortcuts.

Why Metal Garage Doors Lose Heat Fast

Metal conducts heat fast. That means cold air gets pulled in during winter and heat soaks through in summer. With no resistance, the temperature inside your garage changes quickly, making the space uncomfortable or even unusable.

Most basic metal doors are single-layer steel or aluminum with no backing. Once the outside temperature shifts, the inside does too. If your garage shares a wall with your home, it also affects the indoor temperature next to it.

Uninsulated metal also amplifies noise. Traffic, wind, and outdoor sounds transfer right through. So without insulation, your garage isn’t just losing comfort; it’s losing control.

Signs You Need to Insulate Your Metal Garage Door

Most homeowners notice these problems long before they realize what’s causing them. If you’re dealing with any of the following, metal garage door insulation may be overdue:

  • Your garage gets too hot or cold depending on the season
  • The interior wall next to the garage is drafty
  • Stored items are getting moisture damage or warping
  • You hear street noise or wind loud and clear through the garage door
  • Your energy bills are rising and your HVAC system is working harder

Insulating the rest of your home but skipping the garage door is like wearing a winter coat with no zipper. It’s almost working, but not enough.

What Makes Good Garage Door Insulation?

There’s more than one way to insulate a metal door, but some materials do a better job depending on your goal. The top three options for metal garage door insulation are:

Rigid Foam Panels

These offer the highest R-value per inch. They’re cut to fit and glued directly to the garage door panels. The result is a clean look and long-lasting performance.

Reflective Foil Insulation

Best for hot climates, this foil-faced barrier reflects heat away from the surface. It doesn’t absorb heat—it deflects it. Not ideal for winter climates, but helpful in warmer regions.

Garage Door Insulation Kits

These pre-measured systems include foam boards or batting with clips or adhesives. They’re fast to install but may not last as long without reinforcement.

If your goal is noise reduction, rigid foam does better than foil. If your goal is blocking radiant heat in summer, foil might be worth it. But if you’re dealing with both heat and cold throughout the year, foam panel systems offer the most balance.

How to Install Metal Garage Door Insulation the Right Way

Before you install anything, make sure the surface is clean. Dirt, oil, or spider webs will prevent adhesives from sticking. Use a degreaser and a dry cloth to wipe down each panel.

Start by measuring each section of your garage door. Most doors have several horizontal panels, each with its own recessed area. Cut the insulation material slightly smaller than each space so it sits snug but doesn’t bulge. Use high-strength adhesive or mechanical fasteners made for garage doors.

If you’re using a kit, follow instructions carefully. A loose fit won’t work long-term, and poor placement can interfere with your door’s operation.

When in doubt, call in a pro. Insulating garage doors isn’t a high-risk job, but a bad install can cause binding, misalignment, or even damage to your opener system.

Why Metal Garage Door Insulation is Worth It

People don’t always think about garage doors when upgrading insulation. That’s a mistake. Insulating a metal garage door improves comfort and efficiency across the board.

  • Keeps heat inside during winter and blocks it in summer
  • Reduces energy costs by up to 15% when combined with wall insulation
  • Protects stored items from extreme temperature swings
  • Lowers noise from outside traffic or wind
  • Makes the garage more usable for hobbies or work year-round

You don’t have to fully convert your garage into a finished room to make insulation worth it. Even a simple panel upgrade can help your home perform better and feel more comfortable.

Metal vs. Wood: Why Metal Doors Need Extra Help

Wood is naturally thicker and more resistant to temperature changes than metal. Even without insulation, it slows heat loss better and absorbs sound more effectively. Metal, while stronger and lower maintenance, doesn’t offer that built-in buffer.

A metal garage door needs insulation to stay balanced. Without it, heat and cold pass through fast, and condensation can build up on the inside surface. That leads to moisture issues and rising energy costs.

If your garage came with a basic metal door, odds are it was installed without insulation. That gap is what separates a well-functioning space from one that constantly leaks air and noise.

Don’t Let Your Garage Door Work Against You

Metal garage door insulation isn’t about overbuilding. It’s about controlling what you can and making sure your home runs smarter. If you want quieter mornings, lower energy bills, and better protection for your garage gear, insulating the door is a smart move.

If you’re not sure what type of insulation fits your garage or don’t want to deal with uneven cuts and messy adhesives, Peter and Sons can help. We’ve insulated hundreds of metal garage doors across Chicago—clean installs, no guessing, and materials that last. We treat your garage like part of your home, because that’s exactly what it is.

You might like these

How Garage Door Insulation Affects Noise Reduction and Comfort

Garage Door

A noisy garage door can be frustrating. The rattling panels, loud vibrations, or the sound of traffic spilling into your garage can make the space less comfortable to use. 

Many homeowners looking to improve this situation often ask how garage door insulation affects noise reduction

The answer is simple: insulated doors are quieter, sturdier, and help create a calmer environment inside the garage and nearby rooms. 

Let’s break down why that is and what options you have.

How Garage Door Insulation Affects Noise Reduction

Noise travels easily through thin materials. Standard garage doors, especially single-layer steel doors, act almost like drums—vibrations pass through them with little resistance. 

Adding insulation changes that by creating a dense barrier. The extra layers reduce vibration, block outside sounds, and muffle the movement of the door itself.

So, how garage door insulation affects noise reduction comes down to two things: it blocks external noises like traffic, barking dogs, or neighbors’ activities, and it softens the internal sounds of the door opening and closing. 

If your garage is attached to the house, the difference is especially noticeable in nearby living spaces.

Why Are Insulated Garage Doors Quieter?

Insulated garage doors are quieter because they are built with multiple layers—typically steel, insulation, and a backing material—that add both weight and stiffness. 

This solid construction prevents the panels from rattling and reduces the echo often heard inside non-insulated garages. 

For example, a single-layer steel door can shake and vibrate with every opener cycle, creating a hollow banging sound. 

A double-layer door with polystyrene foam feels sturdier and cuts down on those noises, while a triple-layer door with polyurethane insulation offers the best performance by absorbing vibrations and dampening sound significantly. 

This layered design clearly shows how garage door insulation affects noise reduction by adding mass, rigidity, and a buffer between the source of the noise and your living space.

What Types of Insulation Work Best for Soundproofing?

Not all insulation is created equal when it comes to reducing noise. Here are the most common types and how they perform:

  • Polystyrene Panels: Basic foam sheets. Good at reducing some vibration but not as effective for high-level noise reduction.
  • Polyurethane Foam: Denser and stronger. This type bonds directly to the garage door panels, which minimizes flexing and rattling. It’s the best option if noise reduction is a priority.
  • Reflective Foil Insulation: Designed more for radiant heat control. While it offers some sound dampening, it’s not as effective as foam-based options.

If your main concern is how garage door insulation affects noise reduction, polyurethane is the clear winner.

Can Insulation Reduce Noise From the Garage Opener?

Yes, but only to a point. Much of the noise from a garage comes from the opener and the hardware (chains, tracks, rollers). 

Insulation helps reduce the echo inside the garage, but it won’t completely eliminate mechanical sounds. 

For the quietest results, pair insulated doors with a belt-drive opener and nylon rollers. 

This combination significantly cuts down on the rumbling and squeaking that homeowners often complain about.

What About Outside Noise?

Another way to look at how garage door insulation affects noise reduction is through outside sources. If your garage faces a busy road, an insulated door makes a big difference. 

The dense layers absorb much of the noise before it reaches inside. This is particularly valuable if your garage doubles as a workshop, gym, or play area.

For example, a homeowner living on a street with constant traffic noticed that replacing a hollow steel door with a polyurethane-insulated model reduced indoor noise levels by almost half. 

While it won’t block out everything, the improvement is significant enough to change how comfortably the garage can be used.

Added Comfort Benefits of Insulated Doors

Noise reduction is only part of the story. Insulated garage doors also regulate temperature, improve energy efficiency, and add durability. 

Together, these benefits create a garage space that’s not only quieter but also more practical year-round.

Some key advantages include:

  • More Comfortable Workspaces: If you use your garage as a hobby area or gym, you’ll appreciate both the quieter environment and more stable temperatures.
  • Better Protection for Belongings: Insulated doors reduce heat and cold swings that can damage tools, electronics, or even your car battery.
  • Stronger, Longer-Lasting Doors: Insulation reinforces the panels, making them more resistant to dents and daily wear.

This combination of features shows why many homeowners choose to upgrade even when noise reduction is their main goal.

Should You Upgrade or Retrofit?

If your garage door is still in good condition, retrofit insulation kits can add some noise control at a lower cost. 

However, they rarely match the performance of factory-insulated doors. Retrofitted panels may loosen over time, reducing their effectiveness.

For the best and longest-lasting results, upgrading to a professionally installed insulated door is the way to go. Modern models are engineered specifically to address noise, energy use, and durability.

Takeaway

So, how garage door insulation affects noise reduction comes down to its ability to block vibrations, absorb sound, and create a calmer environment. 

By adding insulation, you not only reduce the hollow banging of the door but also cut down on outside noise. 

Pair it with a modern opener and well-maintained hardware, and your garage becomes noticeably quieter and more comfortable.

If you live in Niles, IL or nearby, Peter and Sons Constructions can help you choose and install the right insulated garage door for your home. 

The result: a garage that’s stronger, quieter, and better suited to your lifestyle.

You might like these

How Garage Door Insulation Helps Keep Heat Out of Your Home

Garage Door

When summer temperatures rise, your garage can quickly turn into one of the hottest spaces in the house. 

Since most garages aren’t built with the same insulation as the rest of your home, they often trap heat, making them uncomfortable and even harmful for items stored inside. 

Homeowners often ask: does garage door insulation keep heat out?

The answer is yes, but the results depend on the type of insulation you choose, the condition of your garage door, and the overall setup of your garage. 

Let’s look at how insulation works, the options available, and what you can expect when upgrading your garage door.

How Does Garage Door Insulation Keep Heat Out?

Garage doors are large, thin surfaces that act as conductors of outdoor temperatures. 

When the sun beats down in summer, the metal or wood panels heat up and transfer that heat inside. 

Insulation works as a barrier, slowing the transfer of hot air into the garage. The better the insulation, the more effectively it keeps the garage cooler.

The answer to does garage door insulation keep heat out also depends on the surrounding structure. 

If your garage walls and ceiling are insulated, adding garage door insulation makes a noticeable difference. 

Without it, your garage can reach temperatures 20 to 30 degrees hotter than the outside air.

What Types of Garage Door Insulation Work Best?

There are a few configurations you can choose from depending on your budget and needs:

  • Polystyrene Panels: Lightweight foam sheets inserted into garage door sections. Affordable and easy to install, but offer moderate thermal resistance.
  • Polyurethane Foam: Sprayed or injected into the door sections, creating a denser and stronger barrier. This option provides better insulation and also strengthens the door against dents.
  • Reflective Foil Insulation: Uses aluminum foil layers to reflect radiant heat away from the garage. Works well in hot climates but less effective in colder seasons.

Each type comes with an R-value (a measure of insulation performance). Higher R-values mean better insulation and improved comfort. 

For example, a standard non-insulated steel door may have an R-value of 1, while a high-quality insulated door with polyurethane foam can reach an R-value of 12 or higher. 

That difference can reduce garage heat by 15 to 20 degrees on a summer day.

Does Garage Door Insulation Keep Heat Out During Summer Only?

Many homeowners think insulation is only for cold winters, but it’s equally useful in summer. Just as it prevents warm air from escaping in winter, insulation also keeps hot outdoor air from entering in summer. 

This helps keep the garage closer to indoor temperature levels, reducing stress on air conditioning if the garage is attached to the house.

So, when asking does garage door insulation keep heat out, the answer applies year-round: it helps regulate temperature in both directions.

Can Insulated Garage Doors Lower Energy Costs?

Yes. A hot garage transfers heat into adjacent rooms, making your air conditioner work harder. An insulated garage door reduces that heat transfer. 

If you use your garage as a workshop, home gym, or laundry area, insulation keeps the space more comfortable without running fans or portable AC units.

For attached garages, the benefits extend to the rest of your home. Less heat seeping through the walls means lower cooling bills and a more consistent indoor environment. 

Over time, the energy savings often balance out the cost of upgrading to an insulated garage door.

Another overlooked benefit is noise reduction. Insulated garage doors naturally absorb sound, which can be helpful if your garage faces a busy street or you frequently use power tools inside. 

This makes insulation a smart choice for comfort in more ways than one.

What’s the Best Option for Your Home?

Choosing the right insulation depends on how you use your garage:

  • For homeowners using the garage as a living or working space, polyurethane foam provides the most effective insulation and soundproofing.
  • For storage garages, polystyrene panels may be enough to protect items from extreme heat.
  • For areas with long, hot summers, reflective foil insulation can add extra protection against radiant heat.

If you’re unsure, a professional installer can recommend the right configuration based on your garage door type, climate, and budget.

Should You Replace or Retrofit?

If your garage door is old, warped, or damaged, adding insulation may not be enough. In these cases, replacing the door with a pre-insulated model provides the best results. 

Modern insulated garage doors are built with materials that maximize energy efficiency while improving durability and appearance.

If your door is in good shape, retrofit insulation kits are an affordable way to improve comfort without replacing the entire door. 

Keep in mind that professional installation usually provides tighter seals and better long-term performance than DIY kits.

Why Garage Door Insulation Matters More Than You Think

So, does garage door insulation keep heat out? Absolutely. 

While results vary based on the insulation material and the overall condition of your garage, the right setup can lower indoor temperatures, protect your belongings, and even cut energy costs.

If you spend time in your garage—or simply want to stop it from becoming the hottest part of your home—insulation is one of the smartest upgrades you can make. 

A cooler garage protects everything inside, from power tools and electronics to your car’s battery and tires, which can wear faster in extreme heat. 

Plus, when combined with a quality seal around the door and proper wall insulation, the benefits extend throughout your home.

For homeowners in Niles, IL and nearby communities, Peter and Sons Constructions offers professional garage door installation and insulation services tailored to your needs. 

With the right garage door configuration, you can enjoy a more comfortable home, improved energy efficiency, and peace of mind knowing your investment is working year-round.

You might like these

How to Open Garage Door Without Power

Garage Door

Power outages can be frustrating, especially when your garage door won’t open and you need to get in or out. 

Since most garage doors are powered by an electric opener, the system stops working when electricity is cut off. 

That’s when many homeowners ask how to open a garage door without power. 

The good news is that modern garage doors are designed with a manual release system, so you can operate them safely during an outage. 

Knowing how to do this—and what steps to take afterward—ensures you aren’t left stranded or dealing with unnecessary damage.

Why You Might Need to Open a Garage Door Without Power

The most obvious reason is a power outage. But there are other situations where learning how to open a garage door without power comes in handy. 

Sometimes, the opener itself may fail due to a tripped circuit breaker, a blown fuse, or internal motor issues. 

In other cases, a power surge can disable the system. No matter the cause, being prepared allows you to handle the situation calmly and keep your garage accessible.

How to Open a Garage Door Without Power: Step-by-Step

Most modern garage doors include an emergency release feature that lets you disconnect the door from the opener. This makes it possible to lift and lower the door manually. Here’s the general process:

  1. Make Sure the Door Is Fully Closed
    If the door is stuck halfway open when power goes out, don’t try to release it yet. Secure it first with clamps on the tracks to prevent it from slamming down.
  2. Locate the Emergency Release Cord
    Look for a red cord hanging from the opener rail. This is the manual release handle.
  3. Pull the Cord Firmly
    Tugging the cord disengages the opener’s trolley from the door. You may hear a click as the mechanism unlocks.
  4. Lift the Door Manually
    With the opener disconnected, grab the handle near the bottom of the door and lift it smoothly. Most doors are counterbalanced by springs, so the weight should feel manage
  5. Close the Door Carefully
    When you’re done, lower the door gently to avoid slamming it and damaging the panels or tracks.

This simple sequence is the foundation of how to open a garage door without power. But it’s important to handle the door with care and check that the springs and cables are intact before attempting.

Safety Precautions to Keep in Mind

Manually lifting a garage door can be risky if parts of the system are already worn. For example, if a spring is broken, the door will feel extremely heavy and may be unsafe to lift.

If you notice frayed cables, loud popping sounds, or unusual resistance, stop immediately. Forcing the door open in these conditions can cause injury or damage.

 Always keep a firm grip on the handle, and don’t let children attempt to open the door during an outage. Safety should come before convenience every time.

What to Do After Opening the Door

Knowing how to open a garage door without power is only half the solution. Once the door is open, think about the next steps. If the outage is temporary, you can continue to use the door manually until power returns. 

But if the opener itself is faulty, you’ll need to reset or repair it. 

After electricity is restored, you’ll have to reconnect the opener by pulling the emergency cord toward the opener motor until the trolley snaps back into place. 

Then, run the opener once to fully engage the system.

If your garage is a main entry point, consider keeping a spare house key accessible during outages. That way, you won’t be locked out when the opener isn’t functioning.

Preventing Problems During Future Outages

While you can’t prevent every power outage, you can prepare your garage to handle them better. Regular maintenance of the springs, cables, and rollers ensures the door is safe to operate manually when needed. 

Adding a backup battery to your garage door opener is another smart step. Many newer openers come with built-in battery backup, which allows you to open and close the door automatically even during an outage. 

If security is a concern, make sure your manual release system has a lock to prevent unauthorized access while the power is out.

When to Call a Professional

If you find the door too heavy to lift, the springs may be worn or broken. In that case, it’s not safe to keep forcing the door open manually. Call a garage door professional who can inspect and repair the system.

 Similarly, if the cable slips, the tracks are bent, or the opener doesn’t reconnect after power is restored, professional service is the safest and most effective solution.

Stay Prepared, Stay Safe

Learning how to open a garage door without power gives you confidence during outages and equipment failures. The emergency release system is designed for convenience, but it works best when paired with safety awareness and regular maintenance. 

If the door feels unsafe or refuses to move, don’t risk injury by forcing it. Instead, rely on professional help to restore your garage door to working order.

For homeowners in Niles, IL and the surrounding areas, Peter and Sons Constructions provides expert garage door repair, opener service, and emergency assistance. 

With the right preparation and support, you’ll never be caught off guard by a power outage again.

You might like these

How to Install Reflective Insulation on a Garage Door

Garage Door

If your garage feels like an oven during the summer, you’re not alone. Because garage doors are large, thin surfaces, they soak up the sun’s heat and transfer it indoors, making the space uncomfortable. 

One effective solution is reflective insulation, a material designed to bounce radiant heat away instead of absorbing it. 

Many homeowners want to know how to install reflective insulation on a garage door to make their garages cooler, more energy-efficient, and better protected. 

The process is manageable with the right tools and preparation, but it’s also important to understand why reflective insulation works and how to avoid common mistakes.

Why Reflective Insulation Works

Unlike traditional foam or fiberglass insulation, reflective insulation uses aluminum foil surfaces to reflect radiant heat. 

This means instead of trying to slow down heat transfer, it actively pushes it away. In a garage where the door faces direct sunlight, this can lower indoor temperatures significantly. 

Reflective insulation also adds a lightweight barrier that doesn’t strain the garage door opener or add much bulk to the panels. 

For homeowners curious about how to install reflective insulation on a garage door, the main attraction is comfort; the garage becomes cooler in summer and more consistent in temperature year-round.

Tools and Materials You’ll Need

Before getting started, gather the tools and supplies required for a smooth installation. Having the right items ensures accuracy and prevents mid-project interruptions. Commonly used tools include:

  • Reflective insulation rolls or pre-cut panels
  • Measuring tape for accurate panel sizing
  • Utility knife or heavy-duty scissors for clean cuts
  • Double-sided tape or adhesive strips
  • Straightedge for guiding cuts
  • Safety gear, including gloves and protective glasses

Some kits come with pre-measured panels that fit directly into garage door sections, which can save time. Preparing everything ahead of time allows you to focus fully on the installation itself.

How to Install Reflective Insulation on Garage Door: Step-by-Step

The process is straightforward, but accuracy matters for the best results. Start by cleaning the inside surface of your garage door. 

Dust and grease can prevent the adhesive from sticking properly. 

Next, measure each panel of the garage door and cut reflective insulation panels to size, leaving a slight overlap for better coverage. 

Apply double-sided tape or adhesive strips along the panel edges, then press the insulation firmly into place, reflective side facing outward. 

Work panel by panel until the entire door is covered. Finally, check that no gaps are left uncovered, as even small openings can let heat through and reduce effectiveness.

For pre-cut kits, the process is even simpler. The insulation pieces are designed to fit snugly into the panel recesses without adhesive. 

You’ll just need to press them into place and make sure they’re secure. Either way, the goal is to create a continuous reflective barrier across the entire door.

Safety Precautions to Keep in Mind

When learning how to install reflective insulation on a garage door, safety should always be part of the plan. Make sure the garage door is closed and locked in place before starting to prevent movement. 

If using a ladder, place it on stable ground and avoid leaning too far. Be cautious when cutting foil-backed insulation; it can be sharp along the edges. 

Also, avoid blocking or interfering with the garage door’s moving parts, like hinges, rollers, or tracks. An incorrect installation could damage the door or affect its balance.

Benefits Beyond Cooling

Reflective insulation isn’t just about beating the heat. It offers additional advantages that improve comfort and protect your garage year-round:

  • Temperature Control in Winter: While not as effective as foam insulation in cold climates, reflective insulation still reduces drafts and helps stabilize indoor temperatures.
  • Energy Savings: By lowering the amount of heat transfer, it reduces the load on your home’s HVAC system, especially if the garage is attached to living spaces.
  • Durability: The material resists moisture, mold, and pests, making it a long-lasting solution.
  • Lightweight Design: It adds very little weight to the door, so it won’t strain your opener or springs.
  • Improved Comfort: A garage that’s cooler in summer and less drafty in winter becomes more usable for storage, hobbies, or workouts.

These benefits highlight why reflective insulation is a popular choice for homeowners looking for both comfort and cost savings.

When to Call a Professional

While installing reflective insulation is manageable for many homeowners, not every situation is DIY-friendly. 

If your garage door is older, damaged, or already unbalanced, adding insulation could worsen the problem. In those cases, it’s better to have a professional inspect the door before installation. 

A technician can recommend the right type of insulation, ensure the door’s hardware is in good shape, and even install the insulation for you if needed. 

This guarantees the project is done safely and effectively.

Stay Cooler with Reflective Insulation

Learning how to install reflective insulation on a garage door is a practical way to improve comfort in your garage, especially during hot summers. 

By reflecting radiant heat, this type of insulation helps keep the garage cooler, reduces strain on your cooling system, and adds long-term durability. 

With the right tools and careful installation, you can tackle the project yourself, or rely on professionals for a guaranteed fit.

If you’re in Niles, IL or the surrounding areas, Peter and Sons Constructions can help with garage door insulation, repairs, and upgrades. 

Our team ensures your garage door performs its best while keeping your space comfortable year-round.

You might like these

sabung ayam online

sv388

sbobet88

casino online

scatter hitam

server thailand

mikitoto

pintuplay

slot thailand

slot server thailand

slot777

garuda69

sbobet88

sv388

togel hongkong

mahjong ways 2

Mahjong ways 2

sv388

casino online

BESTTOGEL

BESTTOGEL

scatter hitam

casino online

sabung ayam online

judi bola online

live casino online

mahjong ways

hk pools

SABUNG AYAM ONLINE

SLOT MAHJONG

APK SLOT

SLOT MAXWIN

visitorbet

i8live

i8live

sbobet88

judi basket

sabung ayam online

slot mahjong

mahjong slot

slot777

slot mahjong

sabung ayam online

judi bola online

live casino online

judi bola

sabung ayam online

slot mahjong

Mahjong Ways 2 Mendadak Gacor ! Pola Scatter Cepat Ini Lagi Ramai Dipakai

baristabogota.com

buffetbogota.com

cateringeventos.com

cattleyaeventos.com

cocoaeventos.com

coctelesyeventos.com

daiquiricocktailbar.com

elgranbartender.com

elianahernandez.com.co

escortsenbogota.com

fiestadematrimonio.com

fiestasdematrimonio.com

gigolosenbogota.com

grupoempresarialbaen.com

justmarried.com.co

limopartybogota.com

luxuryeventos.com.co

panelaorganica.com.co

pijamasbogota.com

sexshopcolombia.com.co

sextourbogota.com

showsbogota.com

siluetasytonos.com

simondice.com.co

sipirili.com.co

stripperbogota.com

swingerpartybogota.com

uniformesbogota.com

weddingcolombia.com.co

xn--fiestasde15aos-1nb.com

centro-occidente.coneicc.org.mx

mancomunidad.org

ccfdchildcare.com

www.sasrourissol.fr

www.loucaloun.fr

luxuryeventos.com.co

biopreventative.com

www.beton-cire-13.fr

qhiresolutions.com

cptrekking.com.br

bullandbeartravels.co.tz

cattleyaeventos.com

ablaw.vn

www.mishofamarwah.sch.id

grupoempresarialbaen.com

sherleyskin.com

www.adnmart.com

algnutrastore.com

anigeouscosmetics.com

aqua-dotterel-346593.hostingersite.com

bariahouselifting.com

blazeremedies.in

friendspackermovers.com

gravityprints.com

herbalpowerindia.com

homeheartindia.com

kalanishtha.com

kanhapolyfab.com

muzaffarpurgaushala.org

myratrendz.com

northpackindia.com

orchiddecorcrafts.com

orientaltrimex.com

rainurail.com

royalblue-antelope-713279.hostingersite.com

sharprintech.com

thathardwarestore.com

xtronindia.com